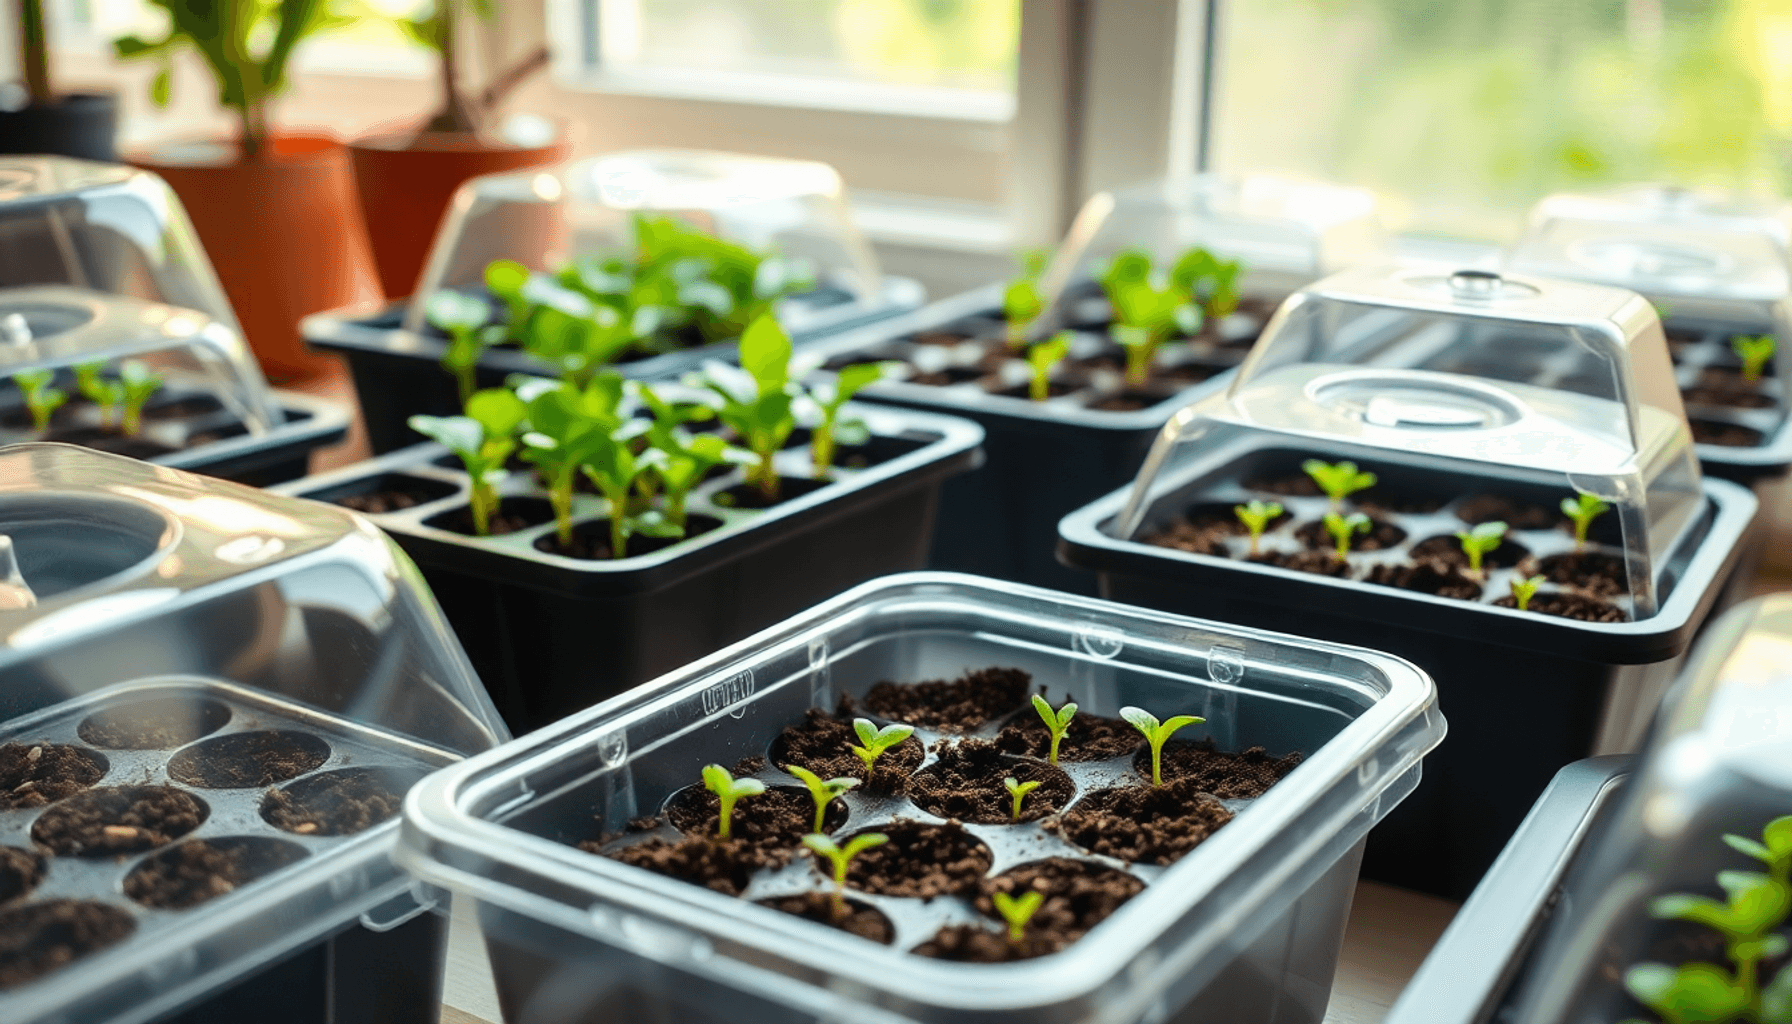

A propagator is a specialized gardening tool designed to create an ideal environment for seed germination and early plant growth. It functions as a mini greenhouse, providing controlled warmth and humidity that young plants need to develop strong roots and healthy shoots.
Using a propagator means establishing a consistent microclimate tailored specifically for seeds and cuttings. This controlled setting protects them from fluctuating outdoor conditions such as cold temperatures, wind, or pests. By trapping moisture and heat, the propagator encourages faster sprouting and reduces the risk of seedlings drying out or failing to thrive.
Key benefits of using a propagator include:
- Faster germination times compared to direct sowing outdoors.
- Higher success rates in raising seedlings due to stable temperature and humidity.
- The ability to start plants earlier in the season, even when outdoor conditions are not yet suitable.
- Enhanced control over the propagation process, helping gardeners manage delicate or slow-germinating species.
Understanding what a propagator is, along with its types and how to use one effectively, empowers you to boost your gardening success from seed stage onward.
Understanding Different Types of Propagators
1. Basic Plastic Propagators
Basic plastic propagators are the most common and straightforward type of propagator used in gardening. They consist of simple containers made from durable plastic, usually rectangular or square, topped with a transparent lid that plays a crucial role in their function.
How Basic Plastic Propagators Work
- The transparent lid allows light to enter while creating a sealed environment that traps moisture and warmth naturally. This combination forms a mini-greenhouse effect, providing ideal conditions for seed germination and early growth.
- Moisture retention is key here: the lid prevents water loss through evaporation, maintaining high humidity levels essential for young seedlings and cuttings.
- These propagators rely on ambient temperature to keep warmth inside, which means they work best in moderate climates or during warmer seasons.
Use Cases for Basic Plastic Propagators
Use cases for basic plastic propagators include:
- Starting common vegetables, herbs, and flowers indoors before outdoor planting.
- Propagating cuttings that require sustained humidity.
- Situations where budget constraints or simplicity are priorities.
Limitations of Basic Plastic Propagators
Limitations become apparent in cooler environments or when growing temperature-sensitive plants:
- Because they lack a heating element, these propagators cannot maintain consistent warmth if room temperatures drop.
- Seeds that require specific temperature ranges for germination may not perform well.
- Humidity control is less precise; overwatering can lead to mold or fungal growth.
Basic plastic propagators remain popular due to their affordability and ease of use. They serve as a reliable entry point into propagation for beginners or gardeners focusing on hardy species that do not demand strict environmental controls.
2. Heated Propagators
Heated propagators are an advanced option among the types of propagators you can choose from, designed to provide consistent warmth essential for faster and more reliable seed germination. Unlike a basic plastic propagator with a transparent lid that relies on ambient temperature and moisture retention alone, heated propagators use a built-in heating element or an external heat mat to maintain the ideal temperature inside the container.
Key features of heated propagators include:
- Built-in Heating Elements: Many heated propagators come equipped with electric heating pads integrated into the base. This feature ensures the soil or growing medium stays at a stable temperature, typically between 18°C and 24°C (65°F to 75°F), which is optimal for most seeds to sprout.
- External Heat Mats: For some models, especially if you already own a basic plastic propagator, you can add a separate heat mat underneath. This flexibility allows gardeners to upgrade their setup without investing in a new unit.
- Temperature Stability: Maintaining consistent warmth encourages quicker germination than relying solely on external conditions. Seedlings benefit from reduced stress caused by fluctuating temperatures, improving overall growth quality.
Advantages that make heated propagators stand out compared to basic plastic propagators:
- Extended Growing Season: You can start seeds earlier in colder months when outdoor temperatures are too low for natural germination.
- Improved Success Rates: Seeds that require warm soil temperatures—like tomatoes, peppers, and certain herbs—are more likely to sprout successfully in a heated environment.
- Controlled Environment: The combination of warmth and moisture retention under the transparent lid creates an ideal microclimate that basic models may struggle to maintain consistently.
Heated propagators fit well for gardeners aiming for reliable propagation results without investing in fully automated systems like thermostatically controlled propagators. They strike a balance between simplicity and enhanced functionality, making them suitable for hobbyists who want better control over temperature but don’t need precise regulation.
3. Thermostatically Controlled Propagators
Thermostatically controlled propagators are the most advanced option among the various types of propagators available in the market. Unlike basic plastic propagators that rely solely on a transparent lid for moisture retention and natural warmth, or heated propagators that provide consistent heat through simple elements or mats, these models have precise thermostat control to maintain an exact temperature range.
Key features include:
- Accurate Temperature Regulation: The built-in thermostat continuously monitors the internal environment, adjusting heating as needed to keep conditions stable. This eliminates temperature fluctuations that can stress young plants or delay germination.
- Customizable Settings: You can set specific temperature targets ideal for your seeds or cuttings. This level of control is especially valuable when dealing with species that require distinct thermal environments during early growth stages.
- Enhanced Moisture Management: While thermostatically controlled propagators still use transparent lids for moisture retention, their regulated heat prevents excess condensation buildup, reducing risks of mold and damping-off diseases common in less controlled setups.
Suitable applications:
- Delicate and Exotic Plants: Some plants from tropical or subtropical regions demand very particular temperature conditions to thrive. Thermostatically controlled propagators create a microclimate mimicking these needs, supporting successful propagation of species that might struggle in basic plastic propagators or even standard heated models.
- Professional and Enthusiast Growers: Gardeners who require reliability and precision choose these propagators to maximize germination rates and seedling health. The ability to fine-tune settings means you can experiment confidently with a wider variety of plants.
In summary, thermostatically controlled propagators elevate the concept of controlled environments by combining moisture retention techniques found in basic plastic propagators with sophisticated temperature management beyond what heated propagators alone provide. This makes them indispensable tools for anyone aiming to propagate sensitive or exotic plants with high success rates.
Using a Propagator Effectively: Step-by-Step Guide
1. Preparing Seeds and Cuttings for Propagation Success
Successful propagation starts well before placing seeds or cuttings into your propagator. The seed preparation method you choose directly impacts germination rates and healthy seedling growth.
Selecting Healthy Seeds
- Choose seeds that are firm, plump, and free from discoloration or damage.
- Check the packet for expiration dates; fresher seeds usually have higher viability.
- For saved seeds, inspect them carefully for mold or pests before use.
- Some seeds benefit from pre-soaking in water for 12 to 24 hours to soften hard coats and speed up germination.
Preparing Cuttings
- Use sharp, clean tools to take cuttings from healthy parent plants.
- Select semi-ripe wood for most shrubs or soft stems for herbaceous plants.
- Remove lower leaves to avoid rotting inside the propagator.
- Dip cut ends in rooting hormone powder or gel to encourage root development.
Cleaning and Sanitizing
- Clean containers, trays, and tools thoroughly before use to prevent disease.
- Sterilize your propagator if it has been used previously by wiping with a mild bleach solution or horticultural disinfectant.
Seed Treatment Techniques
- Scarification: Lightly scratch tough seed coats with sandpaper or a file.
- Stratification: Simulate cold conditions by refrigerating seeds wrapped in damp paper towels for several weeks.
Labeling
- Label your seed trays or pots clearly with plant names and sowing dates.
- Helps track germination progress and manage different species effectively within the propagator.
Employing the right seed planting technique combined with careful seed preparation method ensures that when you start using a propagator effectively, you give your seeds and cuttings the best possible start. This foundational step reduces failures later and sets up seedlings for vigorous growth once transplanted.
2. Maintaining Ideal Conditions Inside Your Propagator Throughout the Process
Maintaining the right environment inside your propagator is crucial for seed germination and healthy seedling growth. Using a propagator effectively involves careful control of moisture, temperature, and humidity to create optimal conditions without risking mold or damping-off diseases.
Watering and Moisture Management
- Seeds and cuttings require consistent moisture to trigger germination. Use a spray bottle or fine watering can to lightly mist the growing medium instead of heavy watering.
- Avoid waterlogging, which can suffocate seeds and encourage fungal growth. The soil should feel moist but not soggy.
- Check moisture levels daily by touching the surface of the compost or seed-starting mix. Dryness will halt germination, while excess moisture promotes mold.
- If condensation builds up excessively on the underside of the lid, open the propagator briefly to allow air exchange and reduce humidity.
Humidity Control Techniques
- The clear lid traps humidity, creating a mini-greenhouse effect that speeds up germination.
- Adjust ventilation by slightly lifting or opening vents in the lid to balance humidity without losing too much warmth.
- For species sensitive to high humidity, partial lid removal after seedlings emerge helps prevent fungal issues while acclimating plants to normal air circulation.
Temperature Monitoring and Adjustment
- Heated and thermostatically controlled propagators allow you to maintain precise temperatures ideal for specific seeds.
- Keep temperatures steady within recommended ranges for your plant types — usually between 65°F and 75°F (18°C to 24°C) for most vegetables and flowers.
- Use a thermometer inside the propagator to track fluctuations. If temperatures rise too high, increase ventilation; if too low, adjust heat settings or relocate the unit to a warmer spot.
- Temperature consistency shortens germination time and improves success rates by supporting steady metabolic activity in seeds.
By focusing on these aspects—proper watering technique, humidity control, and temperature monitoring—you optimize your seed preparation method inside the propagator. These steps are key when using a propagator effectively as part of your gardening routine.
3. Monitoring Growth and Transplanting Seedlings: When and How To Do It Right!
Using a propagator effectively involves more than just maintaining moisture and temperature. Careful observation of seedling growth stages monitoring is essential to know when your plants are ready for the next step. Here are key indicators and steps to help you succeed with transplanting:
Signs Your Seedlings Are Ready to Leave the Propagator
- True Leaves Appearance: After the initial seed leaves (cotyledons), true leaves emerge, which resemble the adult plant's foliage. This indicates healthy development and readiness for transplant.
- Robust Stem Growth: Seedlings develop thicker, sturdier stems capable of supporting themselves outside the controlled environment.
- Reduced Reliance on High Humidity: When seedlings show signs of adapting to less humid conditions, it’s time to begin hardening off.
- Root Development: Roots start to fill the container or seed tray cell but ensure they are not root-bound before transplanting.
Steps for Hardening Off Seedlings Before Outdoor Planting
-
Gradual Exposure
Start by placing seedlings outdoors in a shaded, sheltered spot for 1-2 hours daily. Increase exposure time each day over 7-10 days. -
Adjust Temperature Tolerance
Avoid harsh midday sun or cold nights initially. Aim to gently introduce fluctuating temperatures as part of the seed preparation method. -
Reduce Watering Frequency
Mimic outdoor conditions by allowing soil to dry slightly between waterings, teaching seedlings to cope with natural moisture variation. -
Avoid Wind Stress
Protect young plants from strong winds during this phase to prevent damage.
Monitoring and adjusting temperature settings throughout the process remains important even after seedlings leave the propagator. Proper care during this transition ensures seedlings do not suffer shock or stress that can stunt growth or cause mortality.
Maintaining adequate moisture levels inside the propagator during early germination sets the foundation, but managing environmental changes during hardening off prepares plants for successful establishment in their permanent location.
Following these practices improves your chances of healthy, vigorous plants thriving once transplanted—key aspects when using a propagator effectively combined with proper seed planting technique and seed preparation method.
Benefits of Using a Propagator in Gardening: Why You Should Consider It!
Using a propagator brings distinct advantages that can significantly enhance your gardening success. Understanding the benefits of using a propagator helps clarify why this tool is essential for gardeners aiming for consistent, healthy plant growth.
1. Faster and More Reliable Seed Germination
Seeds placed inside a propagator experience a controlled environment where warmth and humidity are optimized. This condition speeds up germination compared to sowing seeds directly outdoors, where fluctuating temperatures and inconsistent moisture levels can delay or inhibit sprouting. When you use a propagator, seeds absorb water more efficiently and maintain the steady warmth needed to activate their growth processes. This often results in quicker emergence, allowing you to get a jump-start on your growing season.
2. Improved Success Rates for Young Plants
Seedlings started in a propagator are sheltered from harsh outdoor elements like wind, heavy rain, and pests that can damage tender shoots. The stable environment reduces stress on young plants during their most vulnerable phase. By controlling temperature and humidity, you create ideal conditions that support strong root development and healthy foliage growth. When these seedlings are eventually transplanted to their permanent location, they are more robust and better prepared to thrive.
3. Consistent Environmental Conditions
The ability to maintain constant moisture levels prevents common issues such as soil drying out or becoming waterlogged. Moisture trapped by the propagator’s lid mimics greenhouse conditions that nurture seedling health without frequent watering, reducing the risk of damping-off disease caused by fungal pathogens.
4. Extending Your Growing Season
A propagator lets you start seeds earlier than outdoor planting allows. This is particularly useful in cooler climates or early spring when outdoor soil temperatures remain low. Seeds can germinate indoors under optimal heat and humidity before being moved outside once conditions improve.
The benefits of using a propagator clearly demonstrate its role beyond just an accessory—it’s an investment in better seedling establishment and plant vitality. For gardeners asking What is a Propagator? Types and How to Use One, recognizing these benefits helps you choose the right propagator type adapted to your needs while maximizing plant growth potential.
Choosing The Right Propagator For Your Gardening Needs
Selecting the ideal propagator depends on several key factors related to your gardening goals and environment. Understanding these will help you make an informed choice when choosing the right propagator for your needs.
Consider Your Plant Preferences
- Type of plants: Some seeds and cuttings need consistent warmth and humidity, while others tolerate more variable conditions.
- Delicate or exotic species: These often require thermostatically controlled propagators to maintain precise temperature settings.
- Common garden plants: Basic plastic propagators usually suffice for herbs, vegetables, and hardy annuals.
Assess Climate Conditions
- Cool climates or seasons: Heated or thermostatically controlled propagators provide the extra warmth necessary for successful germination.
- Mild or warm climates: Simple plastic propagators can work well without additional heating.
Evaluate Available Space
- Limited indoor space: Compact models or small heated propagators fit better on windowsills or shelves.
- Larger gardening areas: Bigger units with multiple trays allow propagation of many seedlings simultaneously.
Budget Constraints
- Basic plastic propagators: Most affordable option, great for beginners or casual gardeners.
- Heated propagators: Moderate investment with improved temperature control and faster germination rates.
- Thermostatically controlled models: Higher upfront cost but excellent for serious gardeners seeking precision and reliability.
Additional Features to Look For
- Adjustable vents for airflow to prevent mold buildup.
- Transparent lids that allow light penetration while trapping heat.
- Durable materials that withstand repeated use across seasons.
You’ll find that weighing these considerations against your gardening style helps narrow down the best choice in What is a Propagator? Types and How to Use One. This approach ensures your investment supports healthy seed starting and robust plant development from the very beginning.
FAQs (Frequently Asked Questions)
What is a propagator and how does it benefit gardening?
A propagator is a gardening tool designed to create a controlled environment for seeds and young plants. It helps maintain optimal moisture and temperature levels, promoting faster germination and higher success rates for seedlings.
What are the different types of propagators available?
There are mainly three types of propagators: basic plastic propagators with transparent lids that trap moisture naturally, heated propagators equipped with heating elements or heat mats for consistent warmth, and thermostatically controlled propagators that offer precise temperature regulation ideal for sensitive or exotic plants.
How do I use a propagator effectively for seed germination?
To use a propagator effectively, start by selecting healthy seeds or cuttings. Maintain adequate moisture without overwatering to prevent mold, monitor and adjust temperature settings as needed, and ensure proper humidity control throughout the germination process.
When should seedlings be transplanted from the propagator to outdoor conditions?
Seedlings should be monitored closely for growth stages indicating readiness to be moved out. Once strong enough, gradually harden them off by exposing them to outdoor conditions before transplanting to their permanent growing location.
What advantages do heated and thermostatically controlled propagators have over basic plastic models?
Heated propagators provide consistent warmth through built-in heating elements or heat mats, improving germination rates in cooler environments. Thermostatically controlled propagators allow precise temperature management, making them suitable for delicate or exotic species requiring specific growing conditions.
How can I choose the right propagator for my gardening needs?
Consider factors such as the type of plants you wish to grow, local climate conditions, available space, and budget constraints. Basic plastic propagators suffice for general use, while heated or thermostatically controlled models are better suited for sensitive plants or colder climates.