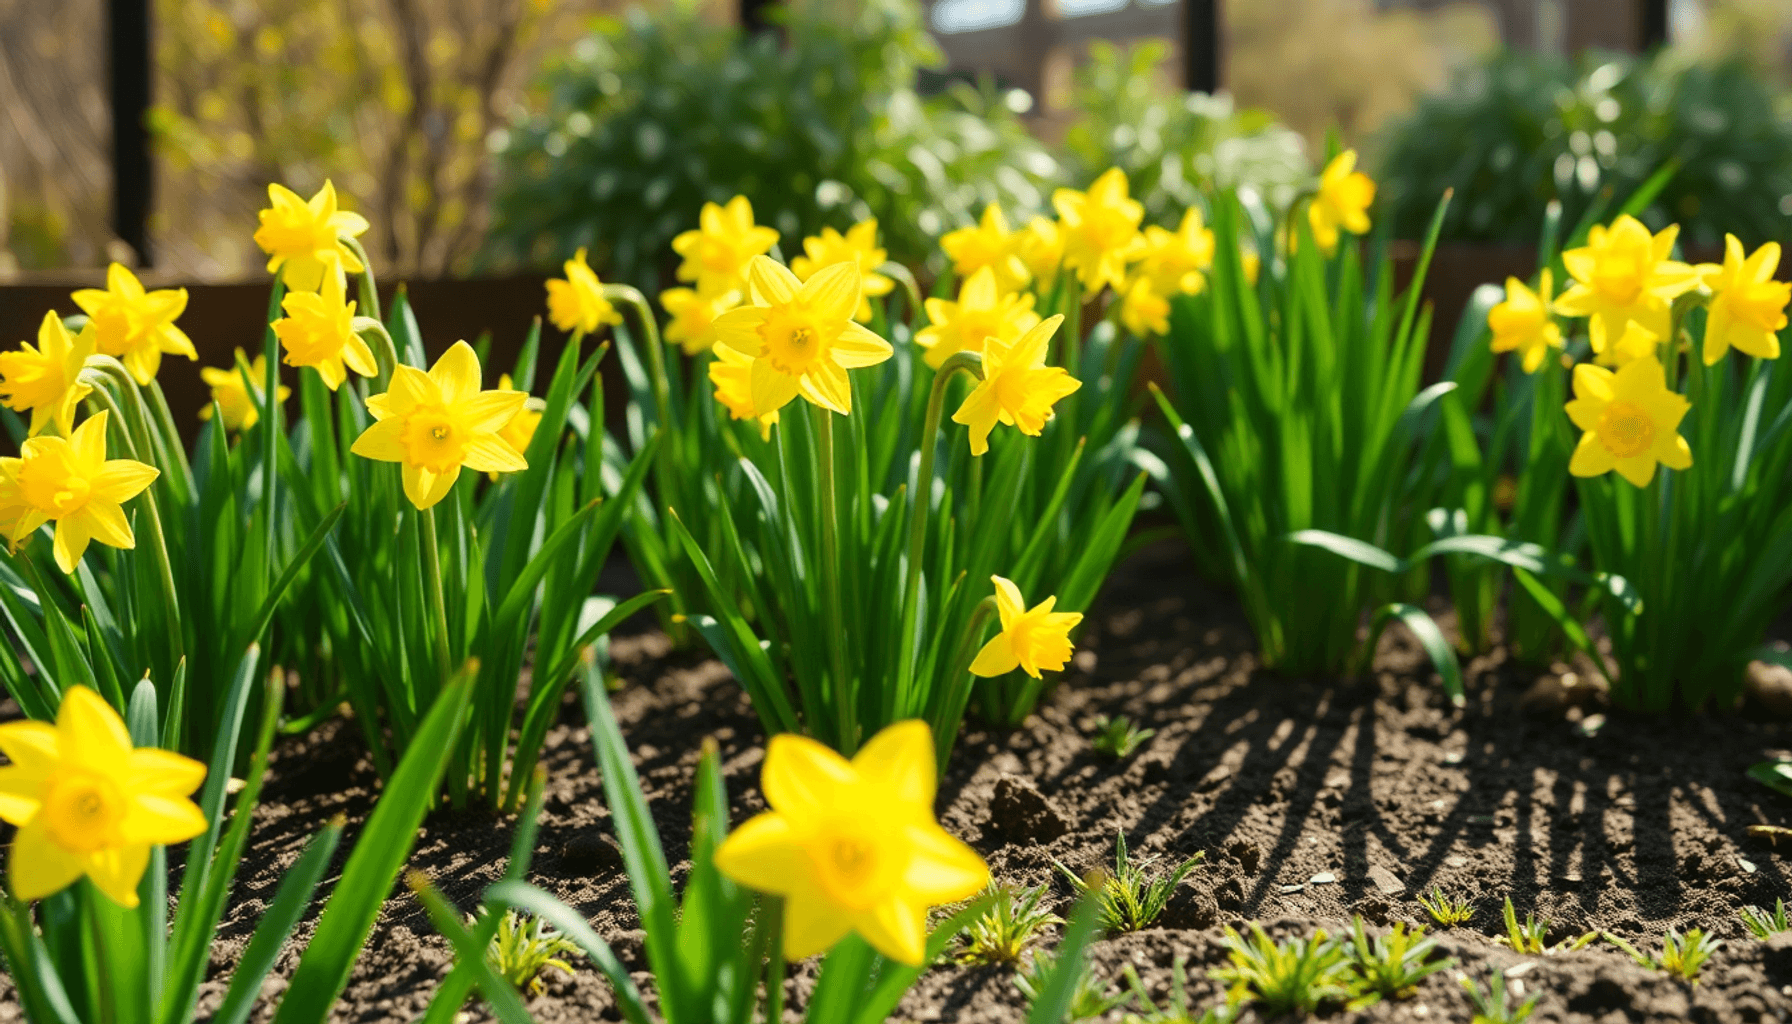

Daffodils are one of the most popular spring-flowering bulbs. They are loved for their bright and cheerful flowers that signal the end of winter. These flowers have a special place in gardens all over the world, not only because of their vibrant yellows and whites but also as powerful symbols of hope and renewal. When daffodils bloom, it often means that spring has arrived, bringing joy with their trumpet-shaped flowers.
If you want to learn how to grow daffodils successfully, this guide will take you through all the important steps. You'll discover:
- How to choose the right varieties and understand their traits
- The best places to plant them for healthy growth
- The correct way to plant including when and how deep
- How to care for daffodils throughout their growing period
- Dealing with common pests and diseases
- Dividing and propagating your bulbs to maintain your garden
- Using daffodils as beautiful cut flowers
- Understanding seasonal blooming patterns to make the most of your enjoyment
Whether you want to spread them across your lawns, showcase them in pots, or force them indoors for early blooms, this article offers practical tips based on experience and horticultural knowledge. Discover the joys of daffodil gardening and relish the dependable beauty of these resilient bulbs year after year.
Understanding Daffodils: Basics and Varieties
Daffodils are easily recognizable flowers with a unique shape. They have a trumpet-shaped center called the corona, which is surrounded by six petal-like segments known as tepals. This distinct structure gives daffodils their signature look. The corona often contrasts in color with the tepals, adding visual interest.
Origin and Natural Habitat
Daffodils belong to the genus Narcissus, native primarily to southern Europe and North Africa. The species Narcissus pseudonarcissus is the classic British wild daffodil, commonly seen in woodlands, meadows, and grassy banks. These bulbs have adapted to thrive in temperate climates with seasonal changes, favoring well-drained soils and moderate moisture.
Range of Colors, Shapes, and Sizes
While many people associate daffodils with bright yellow flowers, they actually come in a variety of colors:
- Colors: Yellow (various shades), white, cream, pale peach, sometimes with orange or pink coronas.
- Shapes: Classic trumpet form, large cups, small cups, double petals resembling peonies.
- Sizes: From miniature varieties under 15 cm tall to larger specimens reaching over 50 cm.
This diversity allows gardeners to select daffodil varieties that suit different garden styles or bloom times.
Hardy Nature and Long Lifespan
Daffodils rank among the hardiest spring bulbs. They tolerate frost and freezing temperatures after flowering buds develop. Once established, they can naturalize easily—multiplying year after year without needing replanting. Their long lifespan means you enjoy reliable blooms for many seasons with minimal intervention.
Popular Species and Noteworthy Varieties
Here are some popular species of daffodils and noteworthy varieties:
- Narcissus pseudonarcissus: Known as the wild or Lent lily, this species features bright yellow flowers with a prominent trumpet. It has inspired many hybrid daffodil types.
- “Ice King”: A celebrated variety notable for its pale yellow blooms that withstand late snowstorms better than many other types. It offers a graceful presence in early spring gardens.
Multiple daffodil varieties exist within the Narcissus genus, providing an extensive selection of daffodil types tailored to different preferences—whether you want bold color statements or subtle elegance.
Exploring these basics equips you to choose the best options for your planting site and aesthetic goals.
Choosing the Right Location for Planting Daffodils
Selecting the ideal daffodil planting location is crucial for healthy growth and vibrant blooms. These bulbs thrive best when planted in a spot that meets their specific light and soil needs.
Sunlight for Daffodils
- Full sun exposure is preferred, meaning at least 6 hours of direct sunlight daily. This encourages strong stems and abundant flowering.
- Daffodils tolerate light shade, such as dappled sunlight under deciduous trees, especially during early spring before tree leaves fully develop.
- Avoid planting in deep shade. Dense shade reduces flowering and can cause weak, leggy growth.
Soil Requirements for Daffodils
- Well-drained soil is essential to prevent bulb rot. Waterlogged or compacted soils create a hostile environment and should be avoided.
- If natural drainage is poor, improve soil by incorporating organic matter like compost or coarse sand to enhance aeration and moisture control.
- Neutral to slightly acidic soil pH suits daffodils well, but they are adaptable across a range of soil types as long as drainage is adequate.
Suitable Planting Locations
- Garden beds: Ideal for showcasing daffodils in borders or mixed perennial beds where they can naturalize and multiply over time.
- Lawns: Perfect for naturalizing daffodils; scatter bulbs in grassy areas to create a meadow-like effect. Bulbs can be planted individually or in clusters for a more dramatic display.
- Containers: Great option for patios or small spaces. Use pots with drainage holes and high-quality potting mix. Containers allow you to control soil conditions more easily and move plants to optimal light as needed.
Choosing the right location sets the foundation for success when growing daffodils. Proper light exposure combined with well-drained soil ensures your bulbs develop strong roots and flourish with bright, cheerful flowers each spring.
When and How to Plant Daffodil Bulbs
Knowing the best time to plant daffodils is crucial for healthy growth and vibrant blooms. For ground planting, early autumn—typically September—is ideal. This timing allows bulbs to establish roots before winter sets in. If you’re working with potted bulbs, spring planting works well since these bulbs can grow actively in controlled environments.
Indoor forced blooming is a popular technique to enjoy daffodils during winter months. Plant bulbs indoors in September to encourage flowering around Christmas or New Year. This method requires chilling the bulbs beforehand or buying pre-chilled bulbs, simulating winter conditions for natural bloom development.
Planting Instructions
- Depth: Plant each bulb about three times its height deep, which usually translates to roughly 10 centimeters (4 inches). This depth protects bulbs from frost and provides stability.
- Spacing: Space bulbs 4–6 inches (10–15 cm) apart. Adequate spacing prevents overcrowding, which can reduce airflow and increase disease risk.
- Orientation: Position bulbs with the pointed end facing upwards. The flat or basal plate side should be downwards where roots will emerge.
Naturalizing Daffodils in Grass
Naturalizing means allowing daffodils to multiply and spread over time in lawns or meadow-like areas. You can plant bulbs directly into grass by:
- Digging holes or trenches at the recommended depth.
- Placing bulbs with correct orientation.
- Covering with soil and gently tamping down.
- Alternatively, scatter bulbs on prepared soil patches and lightly cover them if digging isn’t practical, though this may reduce establishment success compared to precise planting.*
Planting daffodil bulbs correctly ensures vigorous growth, whether you're creating formal garden beds, naturalizing grassy areas, or growing them in containers. Attention to timing, depth, spacing, and bulb orientation lays a strong foundation for flourishing plants.
Soil Preparation and Planting Techniques for Daffodils
Successful growth of daffodils starts with proper soil preparation for daffodils. These bulbs prefer soil that drains well to avoid rot and fungal problems. Choose a planting site free from compacted or waterlogged conditions.
Preparing the Soil
- Check drainage: Dig down about 12 inches to assess how quickly water drains. If water pools or remains soggy, consider improving drainage by incorporating coarse sand or grit.
- Loosen the soil: Break up compacted soil with a garden fork or spade to at least 20 cm (8 inches) deep. This enables roots to penetrate easily and encourages healthy bulb development.
- Add organic matter: Mix in well-rotted compost, leaf mold, or garden peat to improve soil texture and fertility. Organic matter helps retain moisture without causing waterlogging.
- Avoid heavy clay soils: If your soil is clay-heavy, create raised beds or mounds to enhance drainage.
Planting Depth for Bulbs
Planting depth plays a crucial role in protecting bulbs from temperature extremes and pests.
- Aim for a depth of about three times the height of the bulb, typically around 10 cm (4 inches).
- For larger bulbs, increase depth slightly; smaller bulbs can be planted a bit shallower but avoid exposure.
- Dig individual holes or trenches rather than scattering bulbs randomly. This ensures uniform depth and better root establishment.
Spacing for Daffodil Bulbs
Proper spacing prevents overcrowding, which can lead to poor flowering and disease susceptibility.
- Space bulbs approximately 4–6 inches (10–15 cm) apart.
- When planting in groups or naturalizing areas like lawns, maintain consistent distances but allow some randomness for a natural look.
- Crowded bulbs compete for nutrients and moisture, leading to smaller blooms over time.
Step-by-Step Planting Technique
- Prepare planting holes or trenches according to required depth and spacing.
- Place each bulb with the pointed end facing upwards. This orientation encourages shoots to break through the soil surface effectively.
- Cover bulbs gently with soil, firming lightly without compacting tightly.
- Water thoroughly after planting to settle the soil around the bulbs and initiate root growth.
Attention to these details in soil preparation, planting depth for bulbs, and spacing for daffodil bulbs sets a solid foundation for vibrant spring blooms year after year.
Caring for Daffodils During Growth Phase
Watering daffodils requires attention to their stage of growth and planting conditions. Once established in the garden, daffodils need minimal watering except during prolonged dry spells. Their bulbs store enough moisture to sustain growth under typical spring rainfall. Overwatering can lead to bulb rot, especially in poorly drained soils.
Container-grown daffodils demand more consistent care. Pots dry out faster, so you must water regularly from shoot emergence until the foliage naturally dies back. Check soil moisture frequently—keep it moist but not soggy to avoid fungal issues.
Feeding daffodils enhances flowering and overall plant health, particularly important for container plants where nutrients leach out quickly. Use a high-potassium liquid feed starting as soon as shoots appear. Continue feeding weekly or according to product instructions until the leaves begin to yellow and die down. Potassium supports strong blooms and root development, ensuring vibrant flowers year after year.
Key points for caring for container-grown daffodils:
- Water thoroughly when the top inch of soil feels dry.
- Avoid letting containers sit in standing water.
- Apply liquid fertilizer consistently during active growth.
- Stop feeding once foliage starts to fade.
Garden-planted daffodils usually do not require additional feeding if grown in fertile soil with organic matter incorporated at planting time. If your soil is poor or depleted, a balanced bulb fertilizer applied early in spring can benefit shoot and flower quality.
Paying close attention to watering and feeding needs during the growth phase sets up healthy plants that produce bright, long-lasting blooms. Proper care ensures your daffodils thrive both in-ground and in containers throughout their growing season.
After Flowering Care: Deadheading and Foliage Management in Daffodils
Proper deadheading and foliage care after flowering are crucial steps for anyone wanting to grow daffodils successfully. These practices directly affect the health of the bulbs and the quality of future blooms.
Deadheading Daffodils
Deadheading daffodils refers to the process of removing old flowers to promote better growth. Here’s how you can do it effectively:
- Remove faded flowers promptly: As soon as the daffodil blooms start to fade, cut off the spent flower heads.
- Why deadhead? Removing old flowers prevents the plant from wasting energy on seed production. Instead, it redirects resources back into the bulb, which strengthens it for next year’s growth.
- How to deadhead: Use clean scissors or garden shears to snip off only the flower stem, leaving the green leaves untouched. Avoid tearing or damaging any part of the plant.
Foliage Care After Flowering
The leaves that follow bloom play a vital role in nourishing the bulb for future growth. Here’s what you need to know about foliage care after flowering:
- Allow natural dieback of leaves: The leaves following bloom need time—approximately six weeks—to wither and turn yellow naturally.
- Energy storage: During this period, leaves photosynthesize and transfer vital nutrients to the bulb underground. Cutting them back too early starves the bulb, leading to weaker or fewer flowers in subsequent seasons.
- Resist temptation to tidy up too soon: It might be tempting to remove yellowing foliage for a cleaner look in your garden, but patience here pays off. Letting foliage die back naturally ensures healthier bulbs.
Key Takeaways for Effective Post-Bloom Care
- Deadheading daffodils: Remove faded blooms promptly to encourage better display next spring.
- Foliage care after flowering: Do not cut back foliage until it has fully yellowed and dried—usually about six weeks after flowering.
This combination of deadheading daffodils and allowing natural dieback of leaves supports strong energy reserves in bulbs for robust future growth.
Following these simple yet essential steps in caring for your daffodils after they bloom is a fundamental part of how to grow daffodils that come back year after year with vibrant blooms.
Managing Common Pests and Diseases in Daffodil Gardening
Daffodils are known for their strong pest resistance compared to many other spring bulbs, such as tulips. Their toxicity deters many animals from nibbling on them, giving you a natural advantage in the garden. Despite this resilience, certain pests affecting daffodils can pose challenges, especially in specific growing conditions.
Slug Control for Daffodils
Slugs and snails represent the most common pest threat. They tend to target tender buds and flowers, causing visible damage that reduces bloom quality. This problem is particularly noticeable when daffodils are grown in containers or shaded, damp locations where slugs thrive.
Effective slug control methods include:
- Copper tape: Wrapping copper tape around pots or raised beds creates an electric deterrent that slugs avoid crossing.
- Handpicking: Regularly inspecting plants during evening or early morning hours helps reduce slug numbers.
- Organic slug pellets: Use sparingly and opt for pet-safe formulas if applying near edible plants.
- Encouraging natural predators: Birds, frogs, and hedgehogs contribute to keeping slug populations in check.
Preventative measures like improving drainage and avoiding excessive mulch also reduce slug-friendly environments.
Disease Resistance in Daffodils
Daffodils show impressive disease resistance, making them low-maintenance choices for many gardeners. Common fungal diseases that affect other bulbs rarely harm daffodils due to their inherent chemical defenses.
Some minor issues to watch for:
- Basal rot: Caused by soil-borne fungi, this can damage bulbs in overly wet or poorly drained soils.
- Narcissus yellow stripe virus: Presents as yellow streaks on leaves but is uncommon if you source healthy bulbs.
- Fusarium wilt: Rare but possible in warm climates with heavy soils.
Maintaining well-drained soil and avoiding overcrowding reduces disease risk significantly. Remove any yellowing or diseased foliage promptly to prevent spread.
Key Takeaways on Pest and Disease Management
- Daffodils have fewer pest problems than tulips due to their natural toxicity.
- Slug control remains essential, especially for container-grown bulbs; copper tape is a highly effective physical barrier.
- Maintain good cultural practices—well-drained soil, proper spacing—to minimize fungal diseases.
- Vigilance during the growing season ensures early detection of any pest or disease issues before they impact flowering success.
Dividing and Propagating Daffodils: A Guide
Daffodils naturally multiply over time, forming dense clusters known as clumps. Recognizing when these clumps become congested is key to maintaining healthy, vigorous plants.
Signs That Clumps Need Dividing
- Flowering declines or becomes sparse despite usual care.
- Smaller flowers or delayed blooming.
- Foliage growth appears crowded, with bulbs competing for nutrients and space.
- Surface bulbs visible above the soil, indicating overcrowding below.
Typically, autumn is the ideal season for dividing daffodil clumps when the plants are dormant.
How to Divide Daffodil Clumps
Follow these steps for effective bulb division:
- Lift the Clump
Carefully dig around and beneath the cluster using a garden fork or spade, lifting the entire group out of the ground without damaging bulbs. - Separate Bulbs Gently
Shake off excess soil and peel apart individual bulbs or smaller groups. Look for firm, healthy bulbs with no signs of rot or damage. - Trim Foliage if Needed
Cut back any remaining leaves to about 5 cm (2 inches) to reduce moisture loss and stress during replanting. - Inspect Bulbs
Discard soft, moldy, or shriveled bulbs to prevent disease spread. - Prepare Planting Site
Choose well-drained soil in a sunny location. Loosen soil and incorporate organic matter if necessary. - Replant at Proper Depth
Plant each bulb with the pointed end facing upward at around 10 cm (4 inches) deep—roughly three times the bulb's height. Space bulbs 10–15 cm (4–6 inches) apart to allow room for growth. - Water After Planting
Water thoroughly to settle soil around roots and encourage establishment.
Dividing daffodil clumps every few years prevents overcrowding, promoting better flowering and healthier plants.
Propagating Daffodils by Seed
Seed propagation is less common because it requires patience—seed-grown plants may take 5–7 years before flowering. It involves collecting seeds from mature seed pods after flowering, sowing them in well-drained compost, and providing consistent moisture and warmth during germination.
While seed propagation allows breeding new varieties and genetic diversity, most gardeners prefer dividing bulbs as a quicker and more reliable method of propagation.
Dividing daffodil clumps maintains their vigor year after year while seed propagation offers a long-term approach for enthusiasts interested in experimentation. Both methods contribute to sustaining your daffodil collection effectively.
Using Daffodils as Cut Flowers: Tips & Precautions
Cut flowers from daffodils bring a bright, cheerful touch indoors. Knowing when and how to harvest them maximizes their beauty and lifespan in your vase.
Best Stage to Harvest
- Harvest daffodils at the "gooseneck stage" — when the flower stem has grown tall but the flower head is still curved downward like a goose's neck.
- At this stage, blooms haven't fully opened, which allows you to extend vase life significantly.
- Cutting too early or too late shortens how long they stay fresh after cutting.
Handling Toxic Sap
Daffodil sap contains compounds that are toxic to other cut flowers. When daffodil stems are placed in water with other flowers, their sap can cause those blooms to wilt prematurely. Follow these precautions to prevent damage:
- Keep daffodils in a separate vase from other flowers whenever possible.
- If mixing is necessary, let daffodil stems soak alone in water for 24 hours first, then replace the water before adding other flowers.
- Avoid letting daffodil sap come into contact with other stems or foliage.
Care Tips After Cutting
- Use a sharp knife or garden shears to make a clean angled cut on the stem to increase water uptake.
- Immediately place cut stems in fresh, cool water to keep them hydrated.
- Change the water every two days and re-cut stems slightly each time to maintain water absorption.
- Keep vases away from direct sunlight, heat sources, and drafts for longer-lasting blooms.
- Remove any leaves below the waterline to prevent bacterial growth that can shorten vase life.
Mastering these techniques helps you enjoy vibrant daffodil displays indoors while protecting other flowers in your arrangements. These insights add value when learning How to Grow Daffodils not only for garden beauty but also for stunning indoor décor.
Seasonal Blooming Patterns in Daffodil Varieties
Daffodils have a blooming season that lasts from January to May, depending on the specific type of daffodil and where you live. This longer period allows you to enjoy spring flowers for several months instead of just a short time.
Key Factors Influencing Bloom Time
- Variety: Early bloomers like Narcissus ‘Ice King’ can even flower through late winter snowstorms, showcasing resilience and adding color when few other plants dare to bloom.
- Location: Warmer climates may see daffodils emerge earlier, while colder areas experience later flowering.
Extending Bloom Period for Daffodils
You can extend the visual impact of your daffodil display by planting a mix of varieties with staggered flowering times:
- Choose early, mid, and late-season cultivars to create a continuous sequence of blooms.
- Plant bulbs at different depths; shallower bulbs tend to bloom sooner, deeper ones later.
- Combine traditional yellow trumpets with other shapes and colors for variety in form and timing.
Tips for Enjoying Spring Blooms in Your Garden
- Position daffodils where they receive ample morning sun to encourage robust flowering.
- Group bulbs in clusters or drifts rather than single rows for a naturalized effect that attracts the eye during peak blooming.
- Keep soil moist but well-drained to support healthy flowers throughout their season.
- Consider companion plants that bloom before or after daffodils to maintain garden interest as their flowers fade.
“Ice King” stands out as a variety that defies typical seasonal limits—its ability to bloom through chilly conditions makes it valuable for gardeners who want bright color amid late winter’s gloom.
By understanding these seasonal blooming patterns, you ensure a vibrant display that welcomes spring progressively and beautifully.
Conclusion
Growing healthy daffodils is a rewarding way to welcome spring with vibrant, cheerful blooms. These easy-care spring bulbs require minimal effort once planted correctly, making them ideal for gardeners of all skill levels. You can expect:
- Bright, trumpet-shaped flowers that reliably return year after year
- Versatility in planting locations—garden beds, lawns, or containers
- Resilience against pests and diseases common in bulb gardening
By following simple steps on how to grow daffodils—choosing the right site, planting at the correct depth, and caring properly during and after flowering—you set yourself up for success. Each season brings the joy of fresh blooms signaling warmer days ahead and the promise of new growth.
Daffodils are a symbol of hope and renewal in your garden. Their dependable nature and striking presence make them a favorite springtime addition that brightens any landscape with color and life. With just a little preparation and ongoing care, you can enjoy these stunning flowers year after year with ease.
FAQs (Frequently Asked Questions)
What are the best conditions for planting daffodil bulbs?
Daffodils thrive best in a sunny spot with well-drained soil. While they tolerate light shade, avoid deep shade or waterlogged areas. They can be planted in garden beds, lawns for naturalizing, or containers.
When is the ideal time to plant daffodil bulbs for optimal blooming?
Plant daffodil bulbs in early autumn (September) for outdoor garden beds to ensure spring blooms. For container planting or indoor forced blooming, bulbs can be planted in spring or September respectively.
How should I care for daffodils during their growth phase?
Once established, daffodils require minimal watering except during dry spells. Container-grown daffodils need regular watering and feeding with a high-potassium liquid fertilizer from shoot emergence until foliage dies back.
Why is it important to allow daffodil foliage to die back naturally after flowering?
Allowing the foliage to die back naturally over about six weeks post-flowering helps the plant store energy for the next season's growth. Cutting leaves too early can weaken the bulbs and reduce future blooms.
How do I manage pests and diseases common to daffodil gardening?
Daffodils generally have good disease resistance compared to tulips but can be affected by slugs and snails, especially in pots. Using deterrents like copper tape can help protect buds and flowers from damage.
What is the recommended method for propagating and dividing daffodils?
When clumps become congested, usually in autumn, divide the bulbs by carefully separating them and replanting at the correct depth (about three times bulb height). Propagation by seed is possible but takes longer to establish.