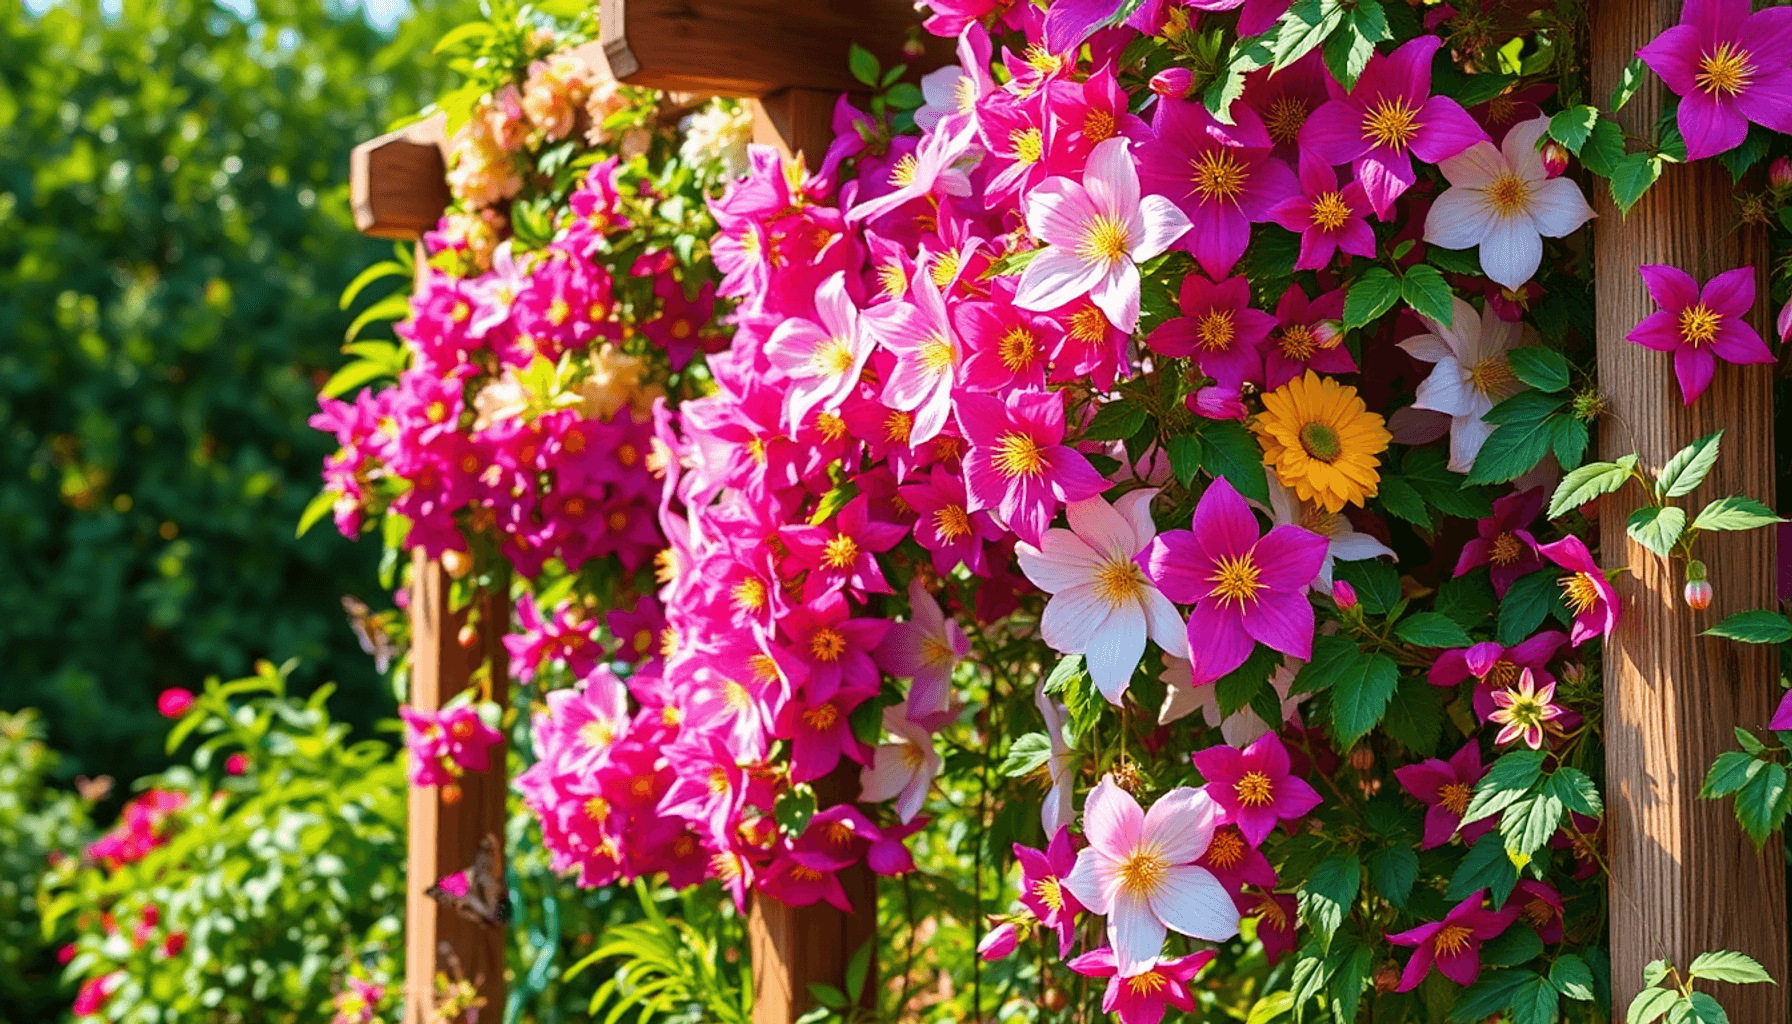

Clematis climbing plants are among the most beloved perennials in garden design. Known for their vibrant flowers, these climbers add instant color and vertical interest to a variety of outdoor spaces. Learning how to grow clematis effectively opens up numerous possibilities for enhancing your garden’s aesthetic and ecological value.
Key features of clematis include:
-
Versatility: Clematis suit multiple garden settings. They thrive on walls, fences, trellises, and even as ground cover. This adaptability makes them a favorite for gardeners seeking dynamic vertical growth or lush low-level greenery.
-
Vibrant Flowers: The blooms vary greatly in size, shape, and color—from delicate star-shaped petals to large, showy blossoms in shades of purple, pink, white, and red. This diversity allows you to choose varieties that complement your garden style perfectly.
-
Wildlife Benefits: Clematis are more than just ornamental. Their flowers attract pollinators such as bees and butterflies, supporting local biodiversity. Dense foliage also provides shelter for insects and small birds, making clematis a valuable plant for wildlife-friendly gardens.
Mastering clematis gardening basics is essential not only for achieving beautiful flowering displays but also for contributing positively to your garden’s ecosystem.
Understanding Clematis Varieties and Growth Habits
Clematis varieties offer a remarkable range in size, flower form, and growth habits, making them adaptable climbing plants for many garden settings. These perennial flowers can vary from compact, low-growing types suited for ground cover to vigorous climbers that reach impressive heights on fences, walls, or trellises.
Sizes and Flower Types
- Large-flowered varieties: These clematis produce bold, showy flowers often exceeding 10 cm (4 inches) in diameter. They bloom profusely in late spring to early summer and sometimes again in late summer.
- Small-flowered types: Featuring more delicate blooms typically under 5 cm (2 inches), these varieties often flower over a longer period, providing continuous interest.
- Bell-shaped or tubular flowers: Some clematis display unique floral shapes like bells or tubes, adding texture diversity to your garden.
- Double and semi-double flowers: Offer fuller blooms with multiple layers of petals for a dramatic effect.
Growth Habits and Garden Suitability
Clematis generally grow by twining their leaf stems around supports. Their climbing habit allows them to scale vertical structures effectively:
- Trellises and fences: Most clematis thrive here, using their twining stems to hold on tightly.
- Walls with wires or mesh: Suitable for large-flowered and vigorous cultivars needing strong support.
- Shrubs and small trees: Certain clematis can be trained through branches without damaging the host plant.
- Ground cover: Low-growing or sprawling varieties work well as decorative mats beneath taller plants.
Selecting the right clematis depends on the space available and the structure you want to cover. Vigorous types need sturdy support; compact ones suit smaller spaces.
Pruning Group Classification
Pruning requirements categorize clematis into three groups. Knowing your plant’s group is essential for maintaining healthy growth and maximizing flowering:
-
Group 1 (Early-flowering)
Blooms on old wood (growth from the previous year).
Minimal pruning needed—usually just removing dead or weak stems after flowering.
Examples include Clematis montana and Clematis alpina. -
Group 2 (Large-flowered hybrids with two flushes of bloom)
Flowers on both old wood (spring) and new wood (summer).
Light pruning recommended in late winter or early spring—remove dead stems and trim lightly to shape.
Includes many popular hybrid varieties like 'Nelly Moser'. -
Group 3 (Late-flowering large-flowered types)
Blooms only on new growth from the current season.
Requires hard pruning in early spring, cutting back all stems to about 30 cm (12 inches) above ground level.
Varieties like ‘Jackmanii’ fall into this group.
Correct pruning timing aligned with these groups helps avoid cutting off flower buds prematurely while encouraging robust flowering cycles.
Understanding these distinctions between clematis varieties, their flower characteristics, growth habits, and pruning needs prepares you to choose the best plant for your garden structure and maintenance preferences. This knowledge ensures your clematis will thrive visually and structurally as a stunning perennial climber in your outdoor space.
Selecting the Right Planting Time and Site
Choosing the best time to plant clematis can significantly impact its establishment and long-term health. Aim to plant your clematis either in spring or during early to mid-autumn. These seasons provide warm, moist soil conditions ideal for root development before the extremes of summer heat or winter cold set in.
Optimal Planting Seasons
- Spring planting: Allows clematis to establish roots during the growing season, supporting vigorous top growth.
- Early to mid-autumn planting: Gives roots time to settle before winter dormancy, leading to strong spring emergence.
Selecting the right planting site plays an equally critical role in clematis success. Most varieties thrive in sunny or partially shaded locations, where they receive at least six hours of sunlight daily. However, some cultivars tolerate full shade but may produce fewer flowers. Understanding your specific clematis variety’s light preferences helps optimize bloom production.
Light Requirements
- Sunny sites: Promote abundant flowering; ideal for large-flowered clematis.
- Partial shade: Suitable for many species, especially those native to woodland environments.
- Full shade tolerance: Available in select varieties but generally results in less robust flowering.
Soil conditions are fundamental when selecting a planting site. Clematis prefer fertile, moisture-retentive soil that is rich in organic matter. Such soil holds adequate water without becoming waterlogged, ensuring roots remain cool and hydrated but not saturated.
Soil Conditions for Clematis
- Loosen soil deeply to improve drainage and aeration.
- Enrich with organic amendments like compost or well-rotted manure to boost fertility.
- Maintain consistent moisture levels, avoiding dry spells that stress young roots.
Planting clematis where the soil remains cool is beneficial since their roots dislike excessive heat. You can achieve this by shading the base with mulch or companion plants while allowing their foliage full access to sunlight above.
Careful planning around planting site selection and timing sets a strong foundation for healthy clematis growth and spectacular flowering displays.
Preparing the Soil and Planting Clematis Correctly
Proper soil preparation and planting technique form the foundation for healthy clematis growth. When planting clematis, it's essential to give the roots plenty of room to spread and establish.
Key steps for soil preparation and planting:
- Dig a generous hole: Aim for a hole at least three times wider and twice as deep as the root ball. This loosens the surrounding soil, allowing roots to penetrate easily.
- Improve soil texture: Mix in well-rotted compost or organic matter with the excavated soil before backfilling to enhance fertility and moisture retention.
- Planting depth depends on clematis type:
For large-flowered varieties (Group 3), bury the crown 5 to 7.5 cm (2 to 3 inches) below the soil surface. This deeper planting helps protect against clematis wilt and encourages strong root development. For other groups (1 and 2), position the root ball just below or at soil level, avoiding excessive depth which can cause rot. - Positioning the plant: Place the stem so that its base sits comfortably in the prepared hole without bending or crowding.
- Firm but gentle backfill: Replace soil carefully around roots, pressing lightly to eliminate air pockets while keeping roots undamaged.
- Water thoroughly after planting: Settling the soil around roots ensures good contact and reduces transplant shock.
The concept of root shading is crucial when you consider how to grow clematis successfully. Roots prefer cool conditions even though top growth enjoys sunlight. Mulching with organic material or planting companion ground cover can keep roots shaded and moist, a technique also supported by shade gardening principles.
By following these guidelines on planting depth for clematis and proper soil preparation, you set your plants up for vigorous growth, abundant flowering, and resilience against common problems.
Watering and Feeding for Healthy Growth
Proper watering clematis is essential to maintain vigorous growth and abundant flowering. Clematis prefer consistently moist soil but dislike waterlogging. During dry spells, you must increase watering frequency to prevent stress and wilting.
Watering Tips for Clematis
- In-ground plants: Deep soak the soil around the roots once or twice a week depending on weather conditions. This encourages roots to grow deeper.
- Container-grown clematis: These require daily watering during the growing season because pots dry out quickly. Use a watering can or hose with a fine rose to avoid soil disturbance.
- Check soil moisture regularly by inserting your finger 5 cm (2 inches) into the soil; if dry, it’s time to water.
Feeding clematis supports sustained flowering and healthy foliage. Nutrient demands rise significantly during active growth phases in spring and summer.
Feeding Tips for Clematis
- Apply a balanced fertilizer or one higher in potash (potassium) every 7–14 days through the growing season. Potash promotes flower development and root strength.
- Liquid feeds are convenient for container plants, ensuring quick nutrient uptake.
- Organic options like seaweed extract or comfrey tea enrich soil fertility naturally without risk of overfeeding.
- Mulching with well-rotted compost or leaf mold around the base retains moisture and slowly releases nutrients.
Clematis care tips emphasize keeping roots cool while providing sun for foliage and blooms. One practical method is to plant low-growing perennials or place mulch/pebbles around the base as root shade, reducing evaporation and temperature fluctuations.
Watering and feeding form the backbone of clematis health. Balanced moisture combined with regular nourishment ensures robust stems, lush leaves, and prolific flowers season after season.
Pruning Clematis According to Their Groups
Pruning clematis is essential for maintaining healthy growth and encouraging vibrant flowering. Understanding the clematis pruning groups helps you apply the right technique at the right time.
Group 1: Minimal Pruning on Old Wood
- These clematis bloom on last year’s growth (old wood).
- Prune only if necessary, immediately after flowering to tidy up.
- Avoid cutting back hard, as flowers form on established stems.
- Examples: Clematis montana, Clematis alpina.
- Deadheading spent blooms can encourage a tidier appearance but won’t promote more flowers.
Group 2: Light Pruning on Old and New Wood
- Flowering occurs on both old and new wood.
- Prune lightly in late winter or early spring before growth begins.
- Remove weak or dead stems, and trim remaining shoots by about one-third to encourage strong new growth.
- After the first flush of flowers in early summer, a light trim can stimulate a second bloom in late summer or early autumn.
- Examples: Clematis ‘Nelly Moser’, Clematis ‘Jackmanii’.
Group 3: Hard Pruning on New Wood
- These are large-flowered clematis that bloom on new wood produced each year.
- In early spring, prune hard by cutting stems back to approximately 30 cm (12 inches) above ground level.
- This encourages vigorous new shoots and larger flowers later in the season.
- Remove all weak or dead wood during pruning to focus energy on healthy growth.
- Examples: Clematis ‘Henryi’, Clematis ‘Dr Ruppel’.
Each group requires different attention during pruning, matching their natural growth habits and flowering cycles. Proper pruning supports plant health, shape, and maximizes flowering potential year after year. For more insights into caring for your clematis plants, you might find this resource helpful.
Propagation Methods for Clematis
Propagating clematis allows you to multiply your plants and share their beauty with others. There are two reliable methods: softwood cuttings and layering clematis stems. Both techniques suit gardeners aiming to expand their collection or replace older plants.
Softwood Cuttings
Softwood cuttings taken in April or May work best when the plant is actively growing but before the stems harden. This method involves:
- Selecting healthy, non-flowering shoots about 8–10 cm long.
- Cutting just below a leaf node using a sharp, clean knife or scissors.
- Removing the lower leaves, leaving a couple of leaves at the top.
- Dipping the cut end in rooting hormone powder to encourage root development.
- Planting the cutting in a pot filled with a free-draining medium such as a mix of perlite and peat moss.
- Covering with a plastic bag or propagator lid to maintain humidity while providing indirect light.
- Keeping the medium moist but not waterlogged until roots form, usually within 3–5 weeks.
Softwood cuttings produce genetically identical plants quickly. Patience and consistent care during this stage ensure successful rooting.
Layering Clematis Stems
Layering is a simple, low-maintenance technique that lets new plants develop roots while still attached to the parent vine. To layer clematis:
- Choose a flexible, healthy stem that can be bent down without breaking.
- Prepare a shallow trench near the base of the plant, loosening soil to help root growth.
- Wound the stem slightly by removing a small strip of bark where it will contact soil; this encourages rooting.
- Peg down the wounded section using garden staples or small stones to keep it in firm contact with soil.
- Cover with soil, leaving the growing tip exposed above ground.
- Water regularly to keep soil moist.
Roots typically form over several months. Once established, sever the new plant from the parent and transplant it carefully.
Both propagation methods preserve desirable traits of your clematis and enhance your garden's diversity without purchasing new plants. Practicing these techniques helps you master how to grow clematis beyond standard planting and care routines.
Managing Pests and Diseases Effectively
Clematis plants attract a variety of pests affecting clematis, as well as common diseases in clematis that can impact their health and appearance. Recognizing these problems early helps you maintain vigorous growth and abundant flowering.
Common Pests Affecting Clematis
1. Aphids
These small, soft-bodied insects cluster on new shoots and flower buds. They suck sap, causing distorted leaves and weakening the plant. Aphids secrete honeydew, encouraging sooty mold growth which affects photosynthesis. Spray affected areas with insecticidal soap or use strong water jets to dislodge them.
2. Earwigs
Earwigs cause mostly cosmetic damage by nibbling on petals and leaves at night. Although they don't seriously harm clematis, their feeding can reduce the visual appeal of flowers. Traps baited with oily substances or rolled-up newspapers can help reduce earwig populations.
3. Slugs and Snails
Young shoots and tender stems are particularly vulnerable to slugs and snails, especially in damp conditions. These pests create irregular holes in foliage and may completely sever young growth. Use organic slug pellets or beer traps near damaged areas to control their numbers.
4. Vine Weevil Larvae (in containers)
Vine weevil larvae can be a problem for container-grown clematis by feeding on roots underground. Look for wilting or poor growth as symptoms. Beneficial nematodes applied to the soil provide an effective biological control.
Common Diseases in Clematis
1. Clematis Wilt
This fungal disease causes sudden blackening of stems and rapid dieback, primarily affecting large-flowered varieties (Group 3). Cut back infected stems to healthy tissue immediately to prevent spread. Good air circulation and avoiding overhead watering help reduce risk.
2. Powdery Mildew
Appears as a white powdery coating on leaves during humid weather. Powdery mildew weakens the plant over time but rarely kills it. Apply fungicides labeled for powdery mildew or use sulfur-based treatments early when symptoms appear.
3. Root Rot
Poorly drained soils encourage root rot caused by fungal pathogens leading to yellowing leaves, stunted growth, and plant decline. Ensure planting sites have good drainage and avoid overwatering.
Preventive Measures
- Inspect plants regularly for early signs of pest activity or disease symptoms.
- Maintain healthy growing conditions with proper watering, feeding, and mulching.
- Remove fallen debris around clematis bases since it can harbor pests and pathogens.
- Encourage natural predators like ladybugs for aphid control.
- Provide adequate spacing between plants for airflow to minimize fungal infections.
Addressing problems promptly will keep your clematis thriving while minimizing the need for harsh chemical controls.
Growing Clematis in Containers
Container gardening with clematis offers flexibility for gardeners with limited space or those who want to add vertical interest to patios, balconies, or small gardens. Success depends largely on pot size and the right compost mix.
Pot Size for Clematis
- Choose a large enough container to accommodate vigorous root growth. A minimum of 30 cm (12 inches) in diameter and depth is recommended.
- Larger pots reduce the frequency of watering and feeding, providing a more stable environment for roots.
- Ensure the container has adequate drainage holes to prevent waterlogging, which can cause root rot.
Soil and Compost Mix
- Use a high-quality, well-draining potting mix enriched with organic matter such as compost or well-rotted manure.
- Adding horticultural grit or perlite improves drainage while retaining moisture.
- Avoid heavy garden soil in containers because it compacts easily and restricts root growth.
Additional Container Care Tips
- Mulch the surface with organic material like bark chips or leaf mold to conserve moisture and moderate soil temperature.
- Keep container-grown clematis well-watered during dry spells; daily watering may be necessary in hot weather.
- Fertilize regularly with a balanced liquid feed or high-potash fertilizer to encourage healthy foliage and abundant blooms.
Growing clematis in containers requires attention to the plant’s needs for space, moisture, and nutrients. With proper pot size and compost choice, your clematis will thrive and provide stunning flowers even without traditional garden soil.
Additional Growing Tips and Companion Planting Ideas
Choosing the right companion plants for clematis enhances both its beauty and health. Clematis thrives when paired with plants that complement its growth habits and flowering periods.
Companion Plants for Clematis:
- Climbing Roses: Combining clematis with climbing roses creates a stunning display of complementary blooms. The robust stems of roses support clematis vines, while clematis adds delicate, colorful flowers that contrast beautifully against rose foliage.
- Lavender and Catmint: These plants attract pollinators and provide a low-growing, aromatic base that keeps clematis roots cool and shaded—important for healthy root development.
- Hostas and Ferns: Ideal for planting around clematis bases to shade roots naturally without competing aggressively for nutrients.
- Spring Bulbs: Daffodils or tulips planted beneath clematis offer early season interest before the clematis begins its main flowering.
Growing Tips to Consider:
- Shade the Roots: Clematis roots prefer cooler conditions. Use mulch or plant shallow-rooted companions to protect roots from overheating.
- Support Structures: Provide sturdy trellises or arches that can accommodate both clematis and companion climbers like roses, ensuring enough space to avoid overcrowding.
- Watering Strategy: When growing multiple plants together, monitor moisture levels carefully. Clematis requires consistent moisture, but avoid waterlogging as it can lead to root rot.
- Feeding Schedule: Companion plants often benefit from similar feeding routines. Applying a balanced fertilizer encourages lush foliage and vibrant flowers across all species.
Incorporating companion plants not only enriches your garden visually but also supports ecological balance by attracting beneficial insects and improving soil quality. This approach aligns perfectly with how to grow clematis successfully while creating diverse, thriving garden spaces.
Conclusion
Growing clematis adds vibrant color and dynamic structure to your garden, turning plain walls, fences, or trellises into lush displays. By following successful clematis growth tips, you ensure these perennial climbers thrive and reward you season after season with stunning blooms.
Keep in mind:
- Planting at the right time and depth supports strong root establishment.
- Providing fertile, moisture-retentive soil enriched with organic matter fuels healthy growth.
- Regular watering and feeding encourage abundant flowering.
- Pruning according to the specific clematis group maintains plant vigor and shape.
- Managing pests and diseases early preserves plant health.
- Companion planting, such as pairing with climbing roses, enhances visual impact.
Clematis also attract pollinators like bees and butterflies, contributing to your garden’s ecosystem. Their dense foliage offers shelter for beneficial insects and small wildlife, creating a lively outdoor space.
Embrace the process of learning how to grow clematis successfully. Watching these climbers flourish not only boosts your garden’s beauty but also connects you more closely with nature’s rhythms. Whether you’re a beginner or experienced gardener, clematis offer a rewarding gardening experience that combines aesthetic appeal with ecological value.
FAQs (Frequently Asked Questions)
What are clematis plants and why are they popular in gardening?
Clematis are perennial climbing plants known for their vibrant flowers. They are versatile in garden settings, suitable for walls, fences, trellises, and even as ground cover. Additionally, clematis plants support pollinators and provide shelter for wildlife.
How do I choose the right clematis variety for my garden?
Clematis varieties differ in size, flower types, and growth habits. Understanding these helps in selecting a plant suitable for your garden structure. They are classified into groups based on pruning needs: Group 1 (minimal pruning), Group 2 (light pruning), and Group 3 (hard pruning). Choose a variety that matches your gardening conditions and maintenance preferences.
When and where should I plant clematis for optimal growth?
The best time to plant clematis is in spring or early to mid-autumn to allow root establishment. Select a sunny or partially shaded location; some varieties can tolerate full shade. The soil should be fertile, moisture-retentive, and enriched with organic matter for healthy growth.
How should I prepare the soil and plant clematis correctly?
Prepare the soil by digging a hole larger than the root ball—about three times wider and twice as deep—to loosen it. For large-flowered Group 3 clematis, bury the crown 5-7.5 cm below the surface. For other groups, plant with the rootball just below the surface to encourage strong growth.
What are the watering and feeding requirements for healthy clematis plants?
Clematis require regular watering, especially during dry spells. Container-grown plants may need daily watering during the growing season. Feeding with appropriate fertilizers supports vigorous growth and abundant flowering.
How do I prune clematis according to their pruning groups?
Pruning depends on the group classification: Group 1 requires minimal pruning after flowering on old wood; Group 2 needs light pruning in late winter or early spring targeting old and new wood blooms; Group 3 demands hard pruning back to about 30 cm above ground in early spring before new growth begins.