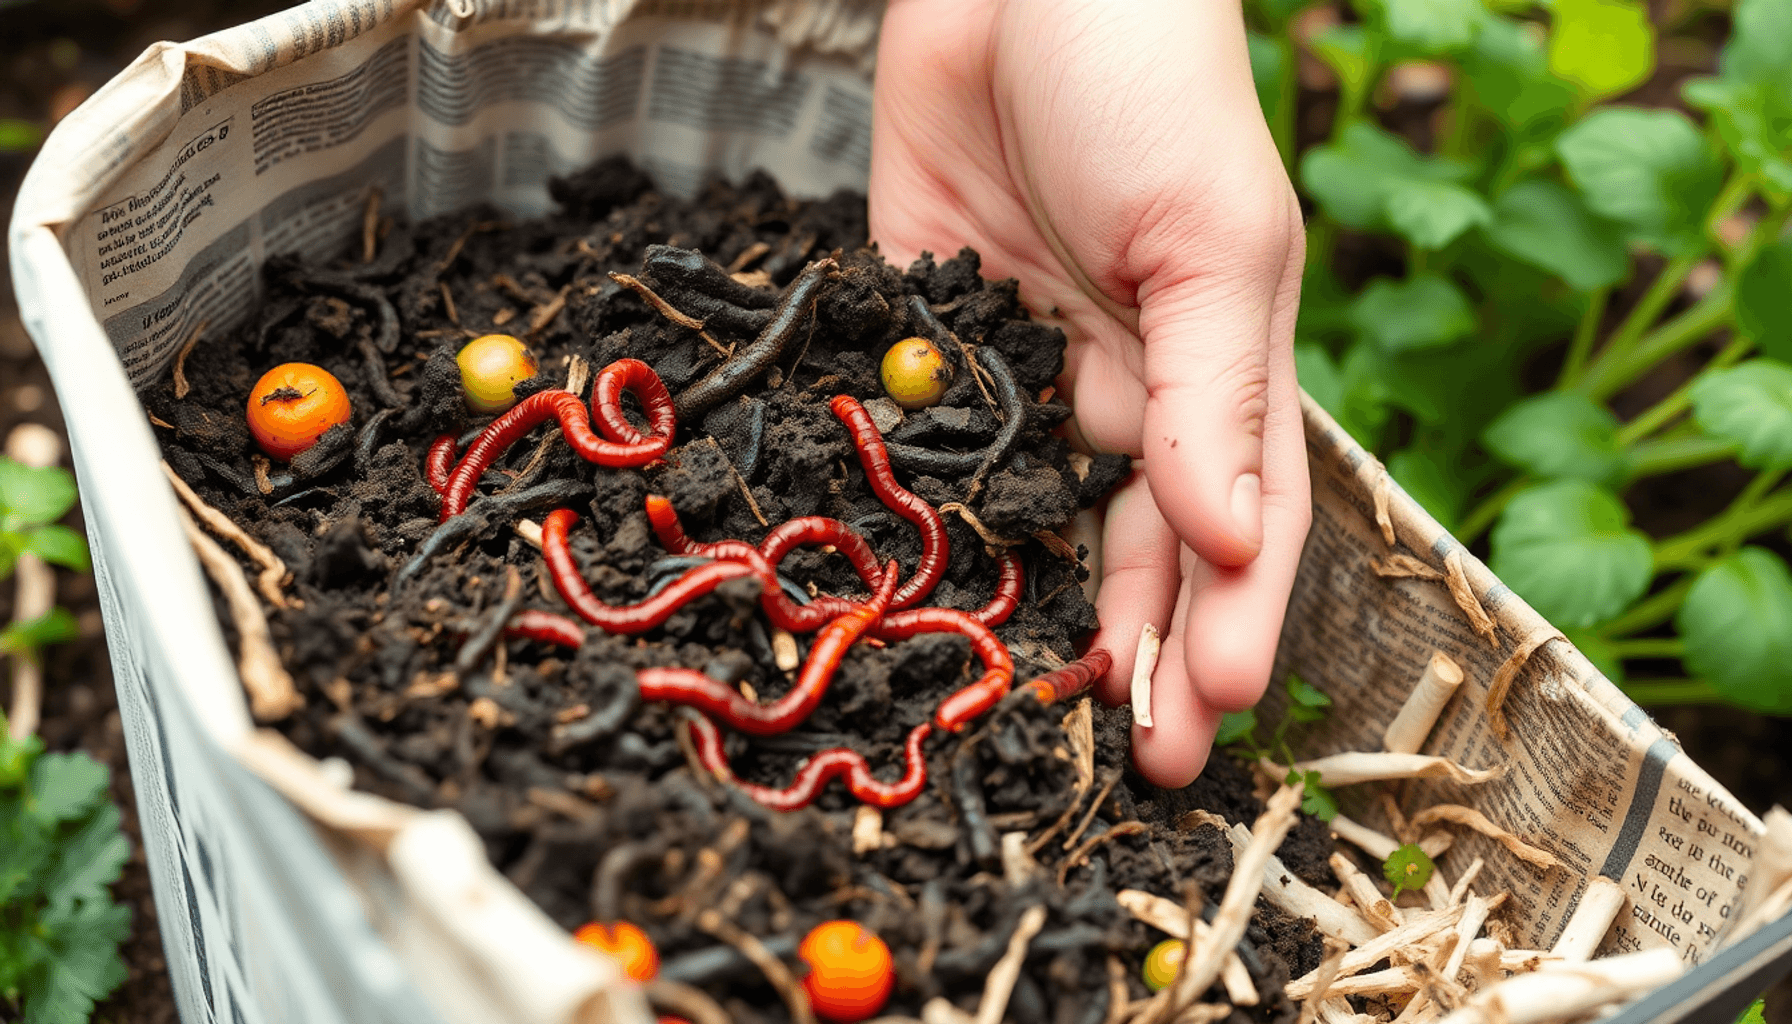

Worm composting, also known as vermicomposting, is an effective method of organic waste recycling that uses worms to transform kitchen scraps and other biodegradable materials into nutrient-rich compost. This process not only reduces the amount of waste sent to landfills but also produces a natural fertilizer that benefits your plants and soil health.
Benefits of worm composting over traditional composting methods include:
- Faster breakdown of organic materials due to worm activity
- Compact setup suitable for indoor or small spaces
- Minimal odor compared to conventional compost piles
- Production of both solid compost and liquid fertilizer, often called "worm tea"
This article explains how to make worm compost through vermicomposting. You will learn:
- The science behind how worms convert organic waste into valuable compost
- How to set up and maintain your own worm compost bin
- What materials worms thrive on and what to avoid feeding them
- Tips for harvesting finished worm castings and using them effectively in your garden
By following these guidelines, you can create an eco-friendly system that recycles your organic waste into a powerful resource for plants.
Understanding Worm Composting
Worm composting, also known as vermicomposting, is a process that turns organic waste into two valuable products: nutrient-rich compost and a liquid fertilizer called worm tea. This transformation occurs thanks to the composting worms, mainly Eisenia fetida, which consume food scraps and bedding material. As these worms digest organic matter, they break it down into simpler compounds that are highly beneficial for soil and plants.
How Worms Convert Waste
Here's how worms turn waste into nutrient-rich compost:
- Worms eat decomposing fruits, vegetables, coffee grounds, and other biodegradable materials.
- Inside their gut, microbes further break down the material.
- The castings (worm droppings) are rich in nutrients like nitrogen, phosphorus, potassium, and trace minerals.
- Excess moisture from the bin collects as worm tea—a liquid fertilizer full of beneficial microbes and nutrients.
- Both castings and worm tea enhance soil structure and promote healthy plant growth.
Advantages of Worm Compost
Worm composting offers several advantages over traditional composting methods:
- Speed: Vermicomposting is faster than traditional compost piles. Worms process food scraps continuously, producing finished compost in weeks rather than months.
- Compactness: Requires less space since bins can be kept indoors or on balconies without large outdoor areas.
- Odor-Free: Properly maintained worm bins emit little to no smell compared to conventional compost heaps that can generate unpleasant odors when anaerobic conditions develop.
Importance of Sustainable Fertilizer
Using vermicompost supports sustainable gardening practices:
- Provides slow-release nutrients that improve plant health without chemical additives.
- Enhances soil biodiversity by introducing beneficial microorganisms critical for nutrient cycling.
- Improves soil water retention and aeration through organic matter enrichment.
- Reduces reliance on synthetic fertilizers that can harm ecosystems.
This biological cycle created by worms not only diverts kitchen waste from landfills but also nurtures healthier plants and soils. Understanding these fundamental benefits sets the stage for creating your own efficient worm compost bin.
Setting Up Your Worm Compost Bin
Creating an effective worm bin is the foundation of successful vermicomposting. The choice of container, ventilation setup, size, and location all influence how well your wormery will function.
Types of Containers Suitable for Worm Bins
- Stacked Plastic Boxes: These are popular because they allow layering. The top box holds bedding and food scraps while worms move upward as they finish composting lower layers. Stackable trays make harvesting easier by separating finished compost from active worm areas.
- Storage Totes: Large plastic storage totes work well for beginners. They are affordable, widely available, and can be easily modified for ventilation. Choose totes made of food-safe plastic if possible.
Both options should be opaque to protect worms from light exposure, which they avoid.
Ventilation for Worm Bin
Worms require oxygen to thrive. Proper airflow prevents anaerobic conditions that cause foul odors and harm worm health.
- Air Holes: Drill multiple small holes (about 1/8 inch diameter) around the sides and lid of your bin to provide adequate ventilation.
- No Drainage Holes Indoors: Unlike outdoor compost bins, indoor worm bins don’t need drainage holes because excess moisture can be managed through bedding adjustments and occasional liquid draining if you have a catch tray underneath.
Cover ventilation holes with fine mesh or pantyhose fabric to keep worms inside while allowing air circulation.
Recommended Size and Location Considerations
- Size: A good rule of thumb is 1 square foot of surface area per pound of food scraps per week. For most households, a bin measuring about 16x24 inches (40x60 cm) with a depth of 8-12 inches works well.
- Location: Place your worm bin in a spot where temperature stays within the ideal range (55°F–85°F or 13°C–29°C). Basements, garages, kitchens with stable temperatures, or shaded outdoor patios are suitable locations.
Avoid direct sunlight or freezing conditions which can stress or kill worms. Also consider accessibility for feeding and maintenance — it should be easy to open your wormery without disturbing surroundings.
In addition to these considerations, it's crucial to understand the specific needs of the worms you are using for composting. Different species may have slightly different preferences in terms of temperature, moisture levels, and food types.
Setting up your worm bin carefully ensures a healthy environment where worms can efficiently convert organic waste into nutrient-rich compost and "worm tea."
Preparing Bedding Material for Worms
The right bedding material is essential to create a comfortable and healthy environment for your composting worms. It serves as their habitat, providing shelter, moisture, and a source of carbon to balance the nitrogen-rich food scraps you add.
Suitable Bedding Materials
Choose from these common options when preparing bedding for your worm bin:
- Shredded newspaper: Avoid colored or glossy paper. Black and white print works best. Tear the pages into thin strips to increase surface area.
- Dry leaves: Crumbled dry leaves mimic natural forest floor conditions and offer good aeration.
- Cardboard: Shred plain cardboard into small pieces. Remove any tape or labels that could contain chemicals harmful to worms.
- Straw: Straw adds bulk and improves airflow but should be chopped finely to avoid large clumps.
- Peat-free compost: This can be mixed in for added organic matter but avoid peat-based products because they are not sustainable.
A mix of these materials often works well, combining fluffiness with moisture retention capabilities.
Moistening Bedding Correctly
Bedding needs to be moistened to the consistency of a damp sponge — not soaking wet or bone dry. Too much water leads to anaerobic conditions causing foul smells and worm distress. Too little water causes dryness, making it hard for worms to breathe and move.
To achieve this:
- Prepare your shredded or chopped bedding material in a large container or bucket.
- Gradually add water while mixing thoroughly.
- Test by squeezing a handful; it should release only a few drops of water without dripping.
- If it’s too wet, add more dry bedding; if it’s too dry, spray lightly with water until reaching the right dampness.
Role of Bedding in Worm Habitat
Bedding acts as the primary living space where worms burrow, lay eggs, and process organic waste. It provides:
- Moisture balance necessary for worm survival since worms breathe through their skin and require humidity.
- Air pockets that prevent compaction and promote oxygen flow crucial for aerobic decomposition.
- A buffer zone that helps regulate temperature fluctuations within the bin.
Properly prepared bedding supports worm health and enhances their efficiency converting your kitchen scraps into rich worm castings.
Preparing your bedding carefully sets the foundation for successful vermicomposting and directly impacts how well your worms thrive during the composting process.
Choosing and Introducing Composting Worms
Choosing the right species of worms is essential for a successful worm composting system. The most widely recommended and effective composting worms are Eisenia fetida, commonly known as red wigglers. These worms are preferred because they thrive in the environment within a worm bin, rapidly consume organic waste, and reproduce quickly.
Key characteristics of Eisenia fetida:
- Adapted to decomposing organic matter: Unlike common earthworms that burrow deep into soil, red wigglers live near the surface where food scraps accumulate.
- Efficient composters: They process waste faster than other worm species, turning it into nutrient-rich castings.
- Tolerance to bin conditions: They handle varying moisture levels and moderate temperatures well, making them ideal for indoor bins.
Composting Worms Lifespan and Breeding
In captivity, red wigglers generally live for about 2 to 3 years. Their breeding rate supports maintaining a healthy worm population if conditions are optimal.
- Reproduction: Red wigglers are hermaphrodites, meaning each worm possesses both male and female reproductive organs. When two worms mate, they exchange sperm.
- Cocoons: Fertilized eggs develop in small cocoons laid in bedding. Each cocoon can hatch multiple baby worms after 3-4 weeks.
- Population growth: Under ideal conditions with sufficient food and proper temperature, populations can double every 60 days or so.
Maintaining a balanced population is important. Overcrowding leads to reduced composting efficiency and stressed worms.
Introducing Worms Safely Into Bedding
Introducing your composting worms properly sets the foundation for their health and productivity.
-
Prepare bedding first
Ensure bedding is moist (damp like a wrung-out sponge) and fluffed up to provide air pockets and comfort. -
Acclimate worms gradually
Before adding worms to the bin permanently, let them adjust by placing their container inside or near the prepared bin for an hour or two. -
Gently spread worms on bedding surface
Avoid burying them immediately; allow them to explore and settle naturally. -
Add a small amount of food on top
Placing a few vegetable scraps nearby encourages worms to stay and start feeding. -
Maintain darkness
Cover the bin loosely with a lid or damp cloth to keep it dark since worms prefer low light environments. -
Avoid disturbing the bin for several days
This gives worms time to acclimate without stress.
Handling worms gently reduces mortality rates during introduction. Always wash your hands before handling worms or bedding materials to prevent contamination that might harm the colony.
Selecting Eisenia fetida ensures you have hardy, productive composting allies that will transform your kitchen scraps efficiently while reproducing steadily under suitable care. Properly introducing them into moist, comfortable bedding invites them to thrive in their new environment and start breaking down waste effectively within days.
What to Feed Your Worms
Feeding your worms the right materials is crucial for a healthy and productive worm compost bin. Not all kitchen waste is suitable as worm food scraps, so knowing what to include and what to avoid helps maintain a balanced environment.
Acceptable Kitchen Waste for Worms
Worms thrive on a variety of organic materials that break down easily without causing odors or attracting pests. Include these in your worm bin:
- Fruit and vegetable peelings: Apple cores, carrot tops, potato skins, leafy greens, and other fresh scraps are excellent.
- Coffee grounds and filters: Coffee grounds provide nitrogen and improve soil texture; use the entire filter if it's unbleached paper.
- Tea bags: Make sure to remove any staples; most natural fiber tea bags break down well.
- Crushed eggshells: They add calcium and help neutralize acidity in the bin.
- Garden trimmings: Small amounts of dead leaves, wilted flowers, and soft plant material can be added sparingly.
Chop or shred larger scraps into smaller pieces to speed decomposition. Bury food scraps a few inches deep into the bedding to prevent fruit flies and odors.
Foods to Avoid Feeding Worms
Some items can harm worms or upset the composting process. Exclude these from your worm food scraps:
- Meat and dairy products: These attract pests, produce strong odors, and decompose slowly in worm bins.
- Citrus fruits: While often advised against, citrus peels can actually be composted in moderation. However, high acidity can harm worms and slow microbial activity if overused.
- Processed foods: Contain preservatives or chemicals that disrupt worm health.
- Moldy or rotten items: May introduce harmful bacteria or toxins into the bin.
Avoid adding oily or salty foods as well since they create an inhospitable environment for worms.
Maintaining this balance between acceptable kitchen waste for worms and foods to avoid feeding worms supports efficient composting. Healthy feeding habits encourage worms to process organic material quickly while keeping your worm bin odor-free and pest-resistant.
Maintaining Your Worm Compost Bin
Keeping your worm bin in optimal condition is essential for healthy worm activity and efficient composting. Proper worm bin maintenance involves managing temperature, moisture, and airflow to create a comfortable environment for your worms.
Temperature Range for Worms
Worms thrive best within a specific temperature range:
- Ideal temperature: 55°F to 85°F (13°C to 29°C)
- Below 50°F (10°C), worms become sluggish, slowing down the composting process.
- Temperatures above 85°F (29°C) stress worms and can lead to death if exposure is prolonged.
- Extreme cold or heat damages the worm colony. Avoid placing your bin in direct sunlight, near heaters, or outside during freezing weather.
Maintaining this temperature range ensures worms stay active year-round, efficiently converting organic waste into nutrient-rich compost.
Moisture Control in Worm Bin
Moisture balance is vital for worm health. The bedding should be kept:
- Damp like a wrung-out sponge—not soaking wet or dry.
- Too much moisture causes anaerobic conditions leading to odors and harmful bacteria.
- Too little moisture dries out the worms and bedding, halting their activity.
Check moisture levels regularly by squeezing bedding samples. If water drips out, reduce moisture by adding dry bedding like shredded newspaper or cardboard. If too dry, mist lightly with water.
Regular Maintenance Tasks
- Fluff Bedding:
Use a small garden fork or gloved hands to gently turn and aerate the bedding weekly. This keeps air circulating, preventing compaction and bad odors. - Monitor Moisture:
Adjust watering as needed to maintain proper dampness. Avoid overwatering when adding food scraps. - Inspect for Pests:
Check for fruit flies or mites; covering fresh food with bedding can help prevent infestations. - Remove Excess Liquid:
If your bin design collects liquid at the bottom ("worm tea"), drain it periodically to avoid waterlogging. - Feed Consistently but Moderately:
Overfeeding leads to uneaten food rotting and unpleasant smells. Feed worms small amounts relative to their population size, increasing gradually as they multiply.
Proper maintenance supports a thriving worm population that quickly processes kitchen scraps into valuable compost without odors or mess.
This careful attention to environment and routine care ensures your vermicomposting system remains productive and sustainable as you continue learning How to Make Worm Compost.
Harvesting Finished Worm Compost and Using It
Harvesting worm castings is a critical step to make the most of your vermicomposting efforts. The goal is to separate nutrient-rich compost from the worms without causing them harm or stress.
Encouraging Worm Migration for Easy Separation
Worms naturally move toward fresh food sources. Use this behavior to your advantage by feeding only one side of your worm bin for about 1-2 weeks. This encourages the worms to migrate gradually toward the new food, leaving the other side filled with finished castings. This method:
- Minimizes disturbance to the worms
- Makes it easier to collect compost without manually sorting worms out
- Maintains worm health and activity
Methods to Collect Nutrient-Rich Castings
After the worms have migrated, you can collect castings safely using several approaches:
- Manual Scooping: Scoop out castings from the emptied side with a small shovel or trowel, taking care not to scoop up any lingering worms. Spread castings on a tarp or tray to visually inspect and remove any worms before using.
- Screen Sifting: Pour castings onto a fine mesh screen or sieve. Shake gently so smaller particles fall through while larger pieces, including worms, stay on top. Return worms back into the bin.
- Batch Harvesting: Some worm bins are designed with removable trays or harvest plates beneath the bedding. When ready, slide out these trays to collect castings without digging into the main bedding area.
Using Worm Castings and Liquid Fertilizer from Worms
Worm castings contain beneficial microbes, nutrients, and organic matter that improve soil structure and boost plant growth:
- Soil Amendment: Mix castings directly into potting soil or garden beds at a ratio of about 10–20%. This enriches soil fertility and water retention.
- Top Dressing: Sprinkle a thin layer around plants as a slow-release fertilizer.
- Compost Tea (Liquid Fertilizer): The liquid draining from your worm bin—often called "worm tea"—is rich in soluble nutrients and microorganisms. Collect this liquid periodically and dilute it with water (about 1:10 ratio) before applying it as a foliar spray or soil drench. It promotes healthy root development and disease resistance.
Handling worm castings gently preserves their beneficial qualities and ensures that you maintain a thriving worm population for ongoing compost production.
For more detailed information about using worm compost effectively, consider checking out this comprehensive resource on vermicomposting.
Environmental Impact and Benefits of Vermicomposting
Vermicomposting offers significant sustainability benefits by greatly reducing the amount of kitchen waste that ends up in landfills. Organic waste such as fruit peels, vegetable scraps, and coffee grounds often produce methane emissions when they decompose without oxygen in landfill sites. Worm composting redirects this waste, turning it into valuable resources instead of harmful greenhouse gases.
Key environmental contributions include:
- Waste Reduction: By feeding food scraps to composting worms, you reduce reliance on landfills and mitigate related environmental issues.
- Lower Carbon Footprint: Vermicomposting uses very little energy compared to industrial composting or waste processing facilities.
The impact goes beyond the surface of the soil, where worm castings improve soil health through various processes:
- Boosted Soil Biodiversity: Worm castings contain beneficial microorganisms that promote a rich, balanced soil ecosystem. This biodiversity is vital for nutrient cycling and disease control.
- Improved Soil Structure: Castings enhance soil porosity and water retention capacity, leading to healthier root development and decreased erosion risks.
- Nutrient-Rich Fertilizer: Unlike synthetic fertilizers, worm castings release nutrients gradually and sustainably, providing plants with essential elements like nitrogen, phosphorus, potassium, and trace minerals.
Regular use of vermicompost helps maintain long-term soil fertility by increasing organic matter content and stimulating microbial activity. This creates a resilient growing environment that supports plant health without the need for chemical inputs.
Vermicomposting not only recycles waste but also actively restores soil ecosystems—making it an essential practice for environmentally conscious gardeners and sustainable agriculture.
Conclusion
You now have an easy vermicomposting guide that empowers you to turn everyday kitchen scraps into a valuable resource. Starting your own worm composting system is a practical step toward sustainable fertilizer production that benefits both your garden and the environment.
Keep these final tips in mind to ensure success with your worms and compost:
- Maintain proper moisture: Bedding should stay damp like a wrung-out sponge, not soaking wet or dry.
- Monitor temperature: Aim for 55°F–85°F (13°C–29°C) to keep worms active and healthy.
- Feed wisely: Offer fruit and vegetable scraps, coffee grounds, and eggshells while avoiding meat, dairy, and citrus.
- Aerate bedding regularly: Fluff it gently to provide oxygen and prevent foul odors.
- Harvest thoughtfully: Separate worms before collecting finished castings to protect your worm population.
By embracing vermicomposting, you create a closed-loop system that reduces waste and enriches your soil with nutrient-rich compost. This approach not only supports plant health but also promotes biodiversity underground, contributing to a thriving garden ecosystem.
Take the first step today—discover how to make worm compost and transform organic waste into garden gold. Your plants will thank you, and so will the planet.
FAQs (Frequently Asked Questions)
What is worm composting (vermicomposting) and how does it work?
Worm composting, or vermicomposting, is the process where worms convert organic waste into nutrient-rich compost and liquid fertilizer known as "worm tea." This sustainable method recycles kitchen scraps and garden waste into valuable soil amendments that enhance plant health and soil biodiversity.
What are the benefits of worm composting compared to traditional composting methods?
Vermicomposting offers several advantages over traditional composting, including faster decomposition, a more compact setup suitable for indoor spaces, and being virtually odor-free. Additionally, it produces high-quality compost and liquid fertilizer that improve soil fertility sustainably.
How do I set up a worm compost bin at home?
To set up a worm bin, use suitable containers like stacked plastic boxes or storage totes with air holes for ventilation but no drainage holes if kept indoors. Choose an appropriate size and location to maintain optimal conditions for your worms to thrive.
What bedding materials are best for worms in a vermicompost bin?
Ideal bedding materials include shredded newspaper, dry leaves, cardboard, straw, or peat-free compost. The bedding should be moistened to a damp consistency similar to a wrung-out sponge to provide habitat and moisture balance essential for worm health.
Which types of worms are best for vermicomposting and how should I introduce them?
The preferred species for vermicomposting is Eisenia fetida, commonly known as red wigglers. They have a suitable lifespan and breeding rate for composting purposes. Introduce them gently into the prepared moist bedding to ensure they acclimate well.
What can I feed my worms and what should I avoid?
Worms can be fed fruit and vegetable peelings, coffee grounds, tea bags, crushed eggshells, and garden trimmings. Avoid feeding them meat, dairy products, citrus fruits, processed foods, or moldy/rotten items to maintain a healthy worm bin environment.