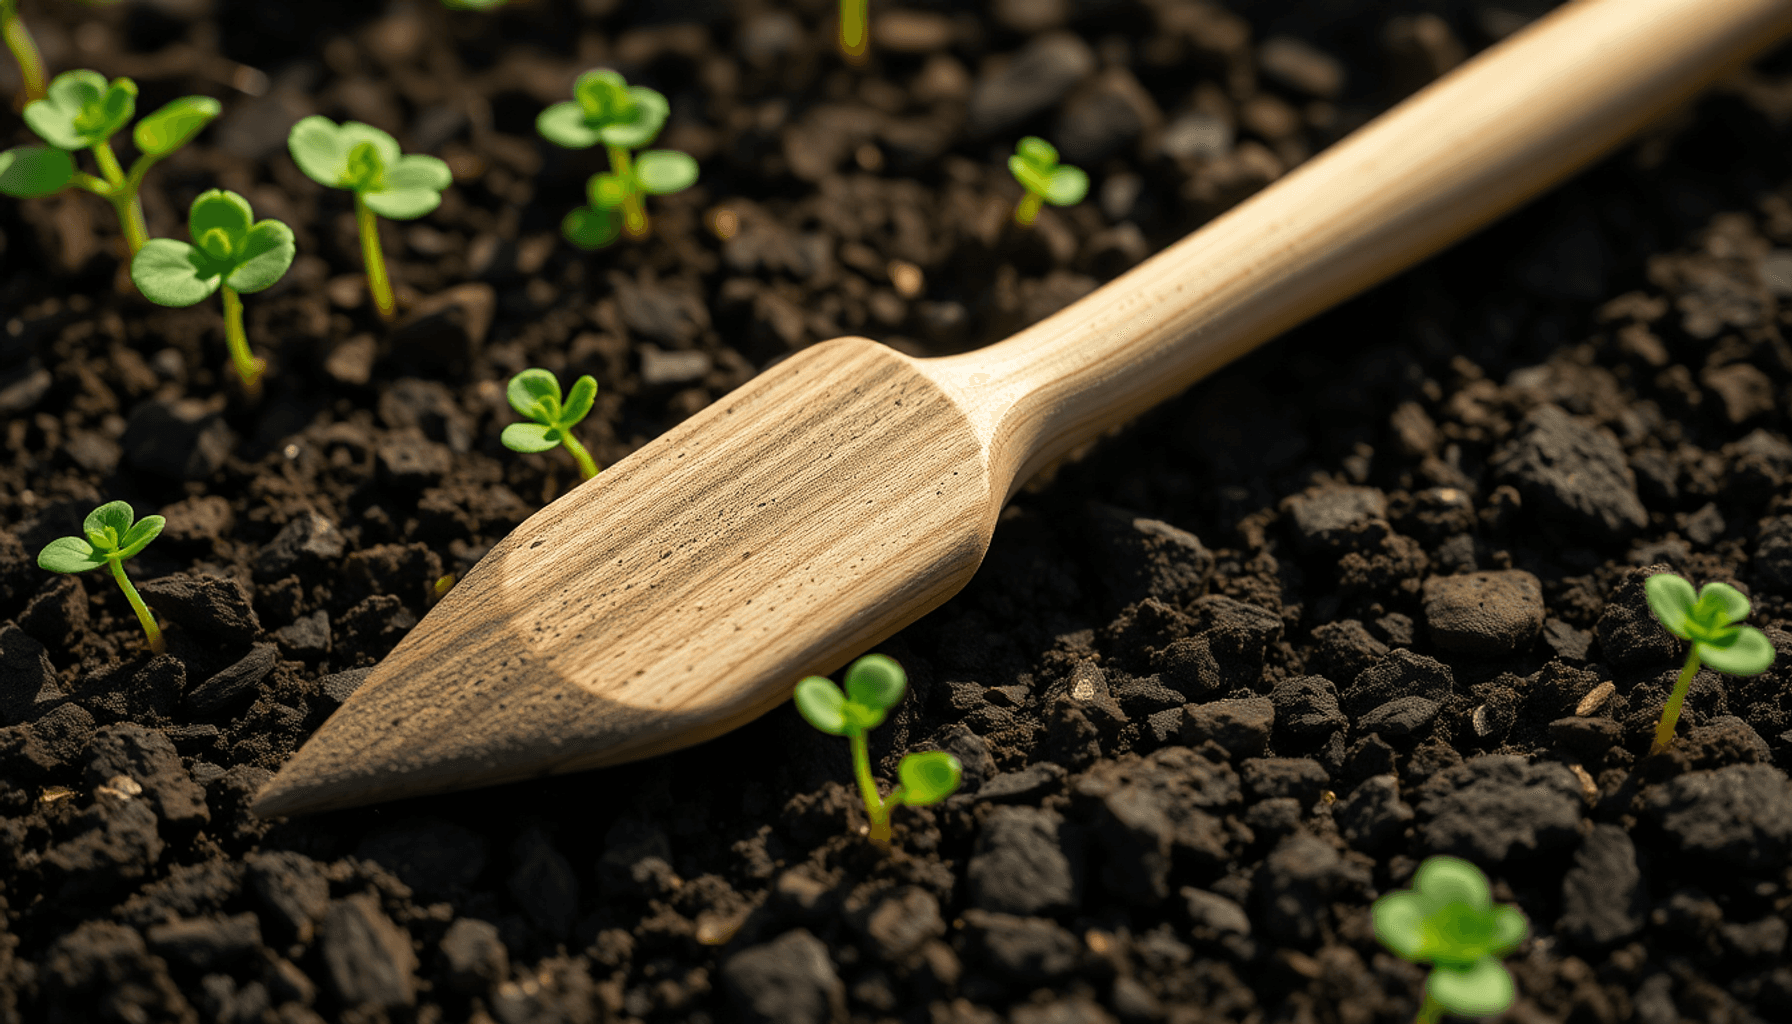

If you're looking for a simple yet effective gardening tool that helps with precise planting, a dibber is an essential aid you should know about. A dibber is specifically designed to create uniform holes in soil or potting mix, making it easier to plant seeds, bulbs, or seedlings at consistent depths and spacing.
Gardeners of all skill levels are increasingly turning to dibbers because they simplify the planting process and promote better growth conditions. Using a dibber ensures that each seed or bulb receives the right amount of soil coverage and room to develop, which can lead to healthier plants and more productive gardens.
This article will answer What is a Dibber? How to Use One in the Garden, exploring the tool’s features, types, benefits, and practical usage tips so you can make the most of this handy planting aid.
What is a Dibber?
A dibber is a simple yet essential gardening tool designed specifically for creating planting holes in soil or potting mix. Its primary purpose is to help gardeners plant seeds, bulbs, or small plants with accuracy and ease. Understanding the dibber definition clarifies why it remains popular among different types of gardeners and in various gardening scenarios.
Shape and Function
Dibbers are typically shaped like a long stick or rod with a sharply pointed end used to pierce the soil. They often include a handle on the opposite end for grip and control. The pointed tip allows you to make uniform holes at precise depths, ensuring consistent planting conditions for seeds or bulbs.
This straightforward design maximizes efficiency by letting you control the hole size and depth, which directly impacts plant health and growth.
Materials Used in Dibbers
Dibbers come in several material varieties, each with its own advantages and drawbacks affecting durability, performance, and user experience. Choosing between these materials depends on your gardening style, soil type, and how frequently you plan to use the tool.
Wood
Traditional wooden dibbers are widely favored for their natural feel. They are lightweight and comfortable to hold, making them a popular choice for smaller-scale home gardening. However, wood may wear down over time or crack if exposed to moisture constantly.
Metal
Metal dibbers, usually made from steel or aluminum, are highly durable and resistant to breakage. They perform excellently in tougher soils where extra force is needed. The main drawbacks are that they can become heavy or cold to hold in certain weather conditions.
Plastic
Modern plastic dibbers, often made from recycled materials, are lightweight, affordable, and resistant to rust or corrosion. They are well suited to softer soils and seed trays, though they may lack the sturdiness required for compacted earth.
Historical Use of Dibbers
The concept of dibbers dates back thousands of years. Archaeological findings show their presence in ancient civilizations such as Rome:
"Roman farmers utilized pointed wooden sticks—early forms of dibbers—to prepare fields efficiently."
This historical usage reflects how vital precise planting was even in early agricultural societies. The continuity of the dibber's basic design through centuries highlights its effectiveness as a tool across different cultures.
Understanding these aspects equips you to select the right dibber type that fits your gardening needs while appreciating its longstanding role in cultivating plants.
Types of Dibbers and Their Features
Dibbers come in various types, each designed to suit different gardening needs and preferences. Understanding their unique features helps you choose the right tool for your planting tasks.
Wooden Dibber
Wooden dibbers are traditional and widely used tools for planting. They offer a natural, lightweight feel and are usually handcrafted with a smooth finish for comfortable handling. When properly maintained, wooden dibbers can be durable, but they may wear down or crack over time if exposed to moisture repeatedly. These tools are ideal for gardeners who prefer eco-friendly, biodegradable options.
Metal Dibber
Metal dibbers are made from stainless steel or other rust-resistant metals, making them highly durable and long-lasting. Compared to wooden or plastic dibbers, they can penetrate harder soils more easily. Many metal dibbers also feature a polished surface for easy cleaning. While slightly heavier than other types, some gardeners appreciate this weight for controlled planting depth.
Plastic Dibber
Plastic dibbers are lightweight and affordable alternatives to wooden or metal options. They come in various colors and designs, often made from recycled materials to support eco-conscious choices. Some plastic dibbers include measurement markings along the shaft to guide precise planting depths. However, they may be less durable under heavy use but resistant to rust and rot.
Ergonomic Handle Designs
Many dibbers now feature ergonomic handles crafted to reduce hand fatigue during extended gardening sessions. These handles fit comfortably in your palm, providing better grip and control while helping maintain consistent pressure when creating holes.
Measurement Markings
A practical feature found on many modern dibbers is measurement markings etched or printed along the shaft. These assist you in setting exact hole depths for different seeds or bulbs according to planting guidelines, avoiding guesswork that can lead to uneven germination or poor root development.
Multi-Dibbers
Designed as an efficient alternative for sowing multiple seeds quickly, multi-dibbers resemble stamps with several pointed prongs. Their advantages include creating multiple uniform holes simultaneously, saving time in seed trays or uniform garden beds, ensuring consistent spacing between seeds crucial for optimal growth and airflow, and being especially useful for gardeners working with small seeds or large planting areas.
Each type of dibber brings distinct advantages depending on your gardening style and soil conditions. Choosing one with ergonomic features and measurement aids can greatly improve your planting accuracy and comfort. Multi-dibbers add efficiency when working on larger projects or seed trays requiring repetitive hole-making.
How to Use a Dibber in the Garden
Using a dibber correctly can make planting seeds and bulbs precise and efficient. Follow these steps to get the best results when working in your garden.
Step 1: Prepare the Soil or Potting Mix
- Loosen the soil with a garden fork or trowel to ensure it’s friable and well-aerated.
- Remove any large stones, roots, or debris that could block the dibber’s point.
- If using pots or seed trays, fill them with a suitable potting mix that drains well but retains moisture.
Proper soil preparation is key for easy dibber penetration and healthy root development.
Step 2: Choose the Right Planting Spot
- Identify areas receiving adequate sunlight based on plant requirements—full sun, partial shade, or shade.
- Check soil drainage; avoid waterlogged spots which can cause bulb rot or seedling failure.
- Consider spacing needs for each plant type to avoid overcrowding and improve air circulation.
Step 3: Mark Your Planting Positions (Optional)
- Use a garden marker or string line to maintain straight rows or consistent spacing between holes.
- This practice helps especially when planting multiple seeds or bulbs of the same variety.
Step 4: Create Holes Using the Dibber
- Hold the dibber firmly by its handle, positioning the pointed end over your chosen spot.
- Push the dibber straight into the soil to the recommended depth for your seed or bulb (refer to seed packets or gardening guides).
- Twist slightly if needed to widen the hole, then gently pull out the dibber without disturbing surrounding soil.
Step 5: Plant Seeds or Bulbs
- Place seeds into each hole carefully; some small seeds may require sowing more than one per hole for better germination chances.
- Insert bulbs with their pointed end up at a depth roughly two to three times their height.
- Cover holes with soil by pressing lightly to eliminate air pockets but avoid compacting it too hard.
Step 6: Water After Planting
- Moisten the planted area gently but thoroughly using a watering can with a fine rose attachment or a gentle spray nozzle.
- Keep soil consistently moist during germination or bulb establishment phases without waterlogging.
Following this step-by-step process ensures you make full use of your dibber's precision capabilities.
Benefits of Using a Dibber
Using a dibber brings several practical advantages that enhance the gardening experience for both beginners and seasoned gardeners. These efficient gardening tools simplify planting tasks, offering precision and control that hand planting alone cannot match.
1. Uniform Planting Depth
The pointed end of a dibber allows you to create holes at consistent depths, ensuring seeds or bulbs are planted exactly where they need to be. This uniformity is crucial for even germination and growth. When seeds are planted too shallow or too deep, it can affect their ability to sprout properly, resulting in uneven plant development.
2. Consistent Spacing
Maintaining regular spacing between plants is essential to prevent overcrowding. A dibber helps achieve consistent spacing by marking precise planting points. This consistency reduces competition for nutrients, water, and sunlight among plants, promoting healthier growth.
3. Healthier Plants Through Improved Air Circulation
Proper spacing facilitated by a dibber enhances airflow around each plant. Better air circulation reduces the risk of fungal diseases and pest infestations by keeping foliage dry and less hospitable to pathogens.
4. Optimized Nutrient Distribution
When plants have adequate space, roots spread evenly without competing aggressively. Nutrients from the soil are absorbed more efficiently, supporting robust plant health and higher yields.
5. Time-Saving Precision
Dibbers reduce guesswork during planting sessions, enabling you to work faster without sacrificing accuracy. This efficiency is especially valuable when working with multiple seeds or bulbs in larger garden beds or seed trays.
6. Adaptability for Various Plant Types
Whether you’re sowing tiny seeds or setting bulbs underground, the dibber’s design allows adjustment to different planting depths and hole sizes. This versatility makes it an indispensable tool across diverse gardening projects.
7. Ease of Use Across Skill Levels
The straightforward operation of a dibber means gardeners at any level can benefit from its precision. Novices gain confidence in planting correctly, while experienced gardeners appreciate the improved control over their layouts.
The precise control over planting depth and spacing provided by a dibber directly contributes to stronger seedlings and mature plants that thrive under optimal growing conditions. Its role as an efficient gardening tool cannot be overstated when aiming for consistency and quality in your garden’s productivity.
Additional Uses of a Dibber in the Garden
A dibber is not limited to creating perfect planting holes. Its design makes it a versatile weed removal tool and soil loosening tool that can assist in various gardening tasks.
1. Weed Removal Tool
The pointed end of a dibber can be used to loosen soil around stubborn weeds. By gently working the dibber under the roots, you reduce the risk of breaking the weed, which often leads to regrowth. This precise approach helps extract the entire root system with minimal disturbance to nearby plants.
2. Soil Loosening Tool
Compact soil in tight spaces or small pots can restrict root growth and water penetration. Using a dibber to poke and break up these compacted areas improves aeration and drainage without disturbing surrounding seedlings or plants. This technique is especially useful for container gardens where space is limited.
3. Creating Micro-Holes for Fertilizer or Water
You can also use a dibber to make small holes near established plants for targeted watering or fertilizer application, ensuring nutrients reach the roots directly without wasting resources.
These additional uses highlight how a simple dibber can serve multiple functions in your garden beyond planting seeds and bulbs. Its compact size and pointed tip offer precision that larger tools cannot match when working in confined or delicate areas.
Choosing the Right Dibber for Your Gardening Needs
Selecting the best dibber depends on several practical factors that affect comfort, durability, and effectiveness in your garden. Here are key considerations to guide your choice when wondering What is a Dibber? How to Use One in the Garden:
Material Matters
- Wood: Classic wooden dibbers offer a natural feel and good grip. They tend to be lightweight but may require more care to avoid splitting or rotting over time. Choose hardwood types like beech or ash for better longevity.
- Metal: Metal dibbers, often made of steel or aluminum, provide superior durability and can penetrate tougher soils with ease. They might be heavier but resist wear and bending. Look for rust-resistant coatings to ensure lasting performance.
- Plastic (Including Recycled Options): Plastic dibbers are generally lightweight and affordable. Eco-friendly models made from recycled plastics reduce environmental impact without sacrificing functionality. These are ideal for lighter soil conditions or container gardening.
Handle Design and Grip
The handle shape influences comfort during extended use and control over planting depth.
- Ergonomic Handles: Curved or padded handles reduce hand fatigue and improve grip security, especially useful if you have arthritis or frequently work in the garden.
- T-shaped Handles: Provide excellent leverage for pushing into dense soil while allowing precise depth control.
- Straight Handles: Simpler designs work well for quick jobs or loose soil but may lack ergonomic benefits.
Size and Length
Select a dibber length that suits your gardening style:
- Shorter dibbers (6–8 inches) are perfect for pots, seed trays, and small beds.
- Longer dibbers (10–12 inches) help plant deeper bulbs or work comfortably without bending too much.
Additional Features
Some dibbers include extra conveniences that enhance usability:
- Measurement Markings: Help you maintain consistent planting depths without guessing.
- Multi-dibber Attachments: Allow making several holes simultaneously, saving time when sowing many seeds.
Personal Preferences and Eco-conscious Choices
Think about how the tool feels in your hand during use. Trying different materials and shapes can clarify what suits your grip style best.
For gardeners prioritizing sustainability, options made from responsibly sourced wood or recycled plastics align with eco-friendly gardening principles.
Choosing wisely means investing in a tool that not only fits your physical needs but also complements your gardening habits and values.
Maintenance and Care Tips for Your Dibber
Proper garden tool maintenance keeps your dibber in top condition, ensuring it works efficiently season after season. Follow these straightforward steps to extend the life of your dibber and maintain its performance:
1. Clean After Each Use
Remove soil and debris immediately after gardening. Use a stiff brush or cloth to clean the pointed end and handle thoroughly. Avoid letting dirt dry on the tool, as it can be harder to remove later and may cause damage.
2. Prevent Rust Buildup
Metal dibbers are prone to rust if not cared for properly. After cleaning, dry the tool completely. Apply a light coat of oil (such as vegetable oil or mineral oil) to metal surfaces to create a protective barrier against moisture. This simple step reduces corrosion significantly.
You can also consider using a method involving a bucket of sand and oil for effective rust prevention, which is detailed in this guide on maintaining garden tools.
3. Check Wooden Handles Regularly
Wooden handles can crack or splinter over time. Inspect for any signs of wear, sanding rough spots gently with fine-grit sandpaper. Treat wooden parts with linseed oil or a similar wood conditioner to keep the handle smooth and prevent drying out.
4. Store in a Dry Place
Store your dibber indoors or in a shed where it’s protected from rain and excessive humidity. Hanging it on a pegboard or placing it in a tool rack helps avoid unnecessary contact with damp ground, which can accelerate rusting or decay.
5. Sharpen the Pointed End if Needed
A sharp tip makes planting easier by penetrating soil with less effort. Use a metal file or sharpening stone to maintain the point’s sharpness, especially if you notice difficulty creating holes in compacted soil.
6. Inspect for Damage Before Use
Check for cracks, bends, or loose handles before each gardening session. Using damaged tools can lead to injury or inefficient planting.
Regular care not only preserves your dibber but also enhances your gardening experience by keeping this essential tool reliable and comfortable to use. Proper maintenance fits naturally into your garden routine and pays off with consistent results every planting season.
Conclusion
A well-chosen dibber transforms your gardening routine by enhancing precision and saving time. This simple tool stands out among gardening efficiency tools for its ability to create uniform planting holes with minimal effort. Whether you are sowing seeds or planting bulbs, a dibber helps maintain consistent depth and spacing, which promotes healthier plant growth.
Key takeaways to keep in mind:
- Versatility makes the dibber valuable not only for planting but also for light soil loosening and weed management.
- Selecting the right material and ergonomic design improves comfort and durability, ensuring long-lasting use.
- Incorporating a dibber into your toolkit supports organized garden layouts and professional-level results.
Remember the question: What is a Dibber? How to Use One in the Garden — now you have the knowledge to answer it confidently and put this tool to work in your own garden. Embrace its practicality to boost your planting success, making every gardening session more efficient and enjoyable.
FAQs (Frequently Asked Questions)
What is a dibber and how is it used in gardening?
A dibber is a pointed gardening tool designed to create precise planting holes for seeds, bulbs, and seedlings. It helps gardeners achieve uniform planting depth and spacing by making it easier to prepare the soil for planting.
What materials are dibbers made from and how do they affect performance?
Dibbers are commonly made from wood, metal, or plastic. Wooden dibbers offer a traditional feel and eco-friendliness, metal ones provide durability and strength, while plastic dibbers are lightweight and often feature ergonomic designs. The choice of material impacts the tool's longevity and ease of use.
What are the different types of dibbers available and their unique features?
There are wooden, metal, and plastic dibbers, each with distinct benefits. Some come with ergonomic handles for comfort and control, measurement markings for consistent planting depth, and multi-dibbers that allow making multiple holes simultaneously to save time during planting.
How do I properly use a dibber for planting seeds and bulbs?
To use a dibber effectively, first prepare the soil or potting mix by loosening it. Then, select an appropriate spot based on sunlight and drainage needs. Use the pointed end of the dibber to create holes at the desired depth and spacing before placing seeds or bulbs into them.
What are the benefits of using a dibber in my garden?
Using a dibber ensures uniform planting depth and consistent spacing, which promotes healthier plant growth through improved air circulation and nutrient distribution. It also makes gardening more efficient by simplifying hole creation for seeds or bulbs.
Can a dibber be used for tasks other than planting?
Yes, besides planting, a dibber can serve as a handy tool for loosening soil around stubborn weeds or breaking up compacted earth in tight spaces. This versatility adds value to its role in garden maintenance.