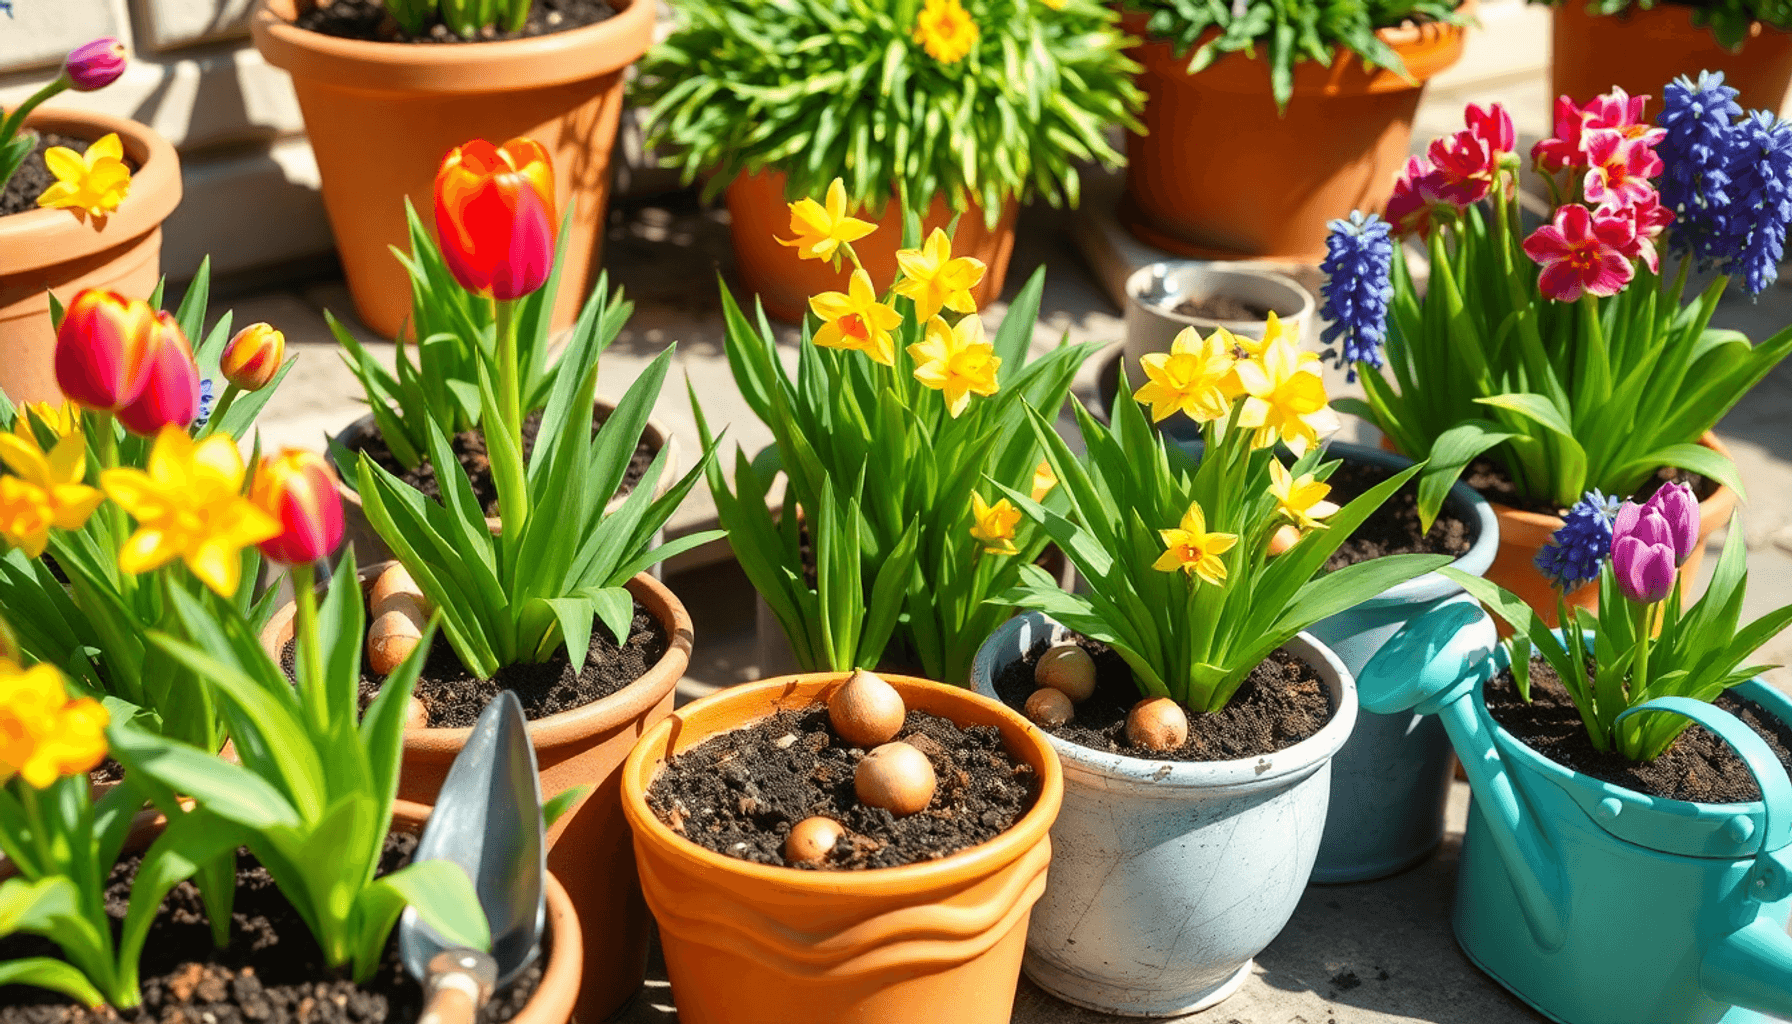

Planting bulbs in pots is a great way to bring colorful spring flowers into small spaces like balconies, patios, or window sills. This type of container gardening is perfect for people living in cities or anyone with a small garden who wants to enjoy seasonal flowers without needing a big yard.
Why should you consider planting bulbs in pots?
- Space-efficient: Perfect for apartments and small outdoor areas.
- Rewarding: Bulbs reliably produce colorful flowers year after year.
- Versatile: Easily moved or rearranged to enhance your space.
What will you learn in this guide?
- How to choose the right bulbs for container growing.
- Selecting suitable pots and soil to support healthy growth.
- Step-by-step planting techniques for successful blooms.
- Care tips to maximize flowering and maintain bulb health.
This guide will teach you how to plant bulbs in pots so you can create a beautiful display of seasonal flowers even with limited space.
Choosing the Right Bulbs for Pots
When selecting bulb varieties for pots, understanding the difference between spring-flowering bulbs and summer-flowering bulbs is essential. Each group has distinct planting times and growth habits that affect their performance in containers.
Spring-Flowering Bulbs
These bulbs are typically planted in autumn to bloom in early to late spring. They are well-suited for container gardening because they require a cold period in winter, which pots can easily provide outdoors. Their compact size and vibrant colors make them favorites for small space gardeners.
Popular spring-flowering bulbs include:
- Tulips: Known for their wide color range and elegant shapes, tulips bring a classic spring display to any pot.
- Daffodils: Reliable and hardy, daffodils produce cheerful yellow or white blooms and tolerate cooler conditions well.
- Crocuses: Small but striking, crocuses are among the first bulbs to bloom, signaling the start of spring with bright purples, yellows, or whites.
- Irises: Bulbous irises offer delicate flowers in blues, purples, and yellows, adding height and texture to pot arrangements.
- Hyacinths: Valued for their intense fragrance and dense flower clusters, hyacinths create a sensory experience beyond just visual appeal.
Summer-Flowering Bulbs Suitable for Autumn Planting
Some summer-flowering bulbs also thrive when planted in autumn. These tend to bloom later than spring bulbs but still fit well into container settings due to their manageable size and stunning floral forms.
Examples include:
- Alliums: Featuring globe-shaped flower heads on tall stems, alliums provide architectural interest and attract pollinators.
- Lilies: With large, showy flowers often scented, lilies add elegance and height to potted displays during summer months.
- Crocosmia: Producing graceful arching spikes of fiery orange or red flowers, crocosmia brightens late summer with vivid color.
Suitability Considerations
When choosing bulbs for pots, consider:
- The required chilling period: Spring-flowering bulbs need cold winters; pots should be placed outdoors where temperatures drop sufficiently.
- Pot size relative to bulb size: Larger bulbs like lilies benefit from deeper containers.
- Bloom timing: Combine early spring bulbs with later summer ones if layering or creating succession blooms.
Selecting the right combination of these bulb types ensures an extended flowering period while making the most of limited garden space.
Selecting Suitable Containers and Soil
Choosing the right pot selection is critical for successful bulb growth in containers. Bulbs need enough space to develop roots and store energy, so opt for large pots that provide ample room. A container with a depth of at least 20-30 cm (8-12 inches) works well for most bulb varieties. The width should also allow bulbs to be planted close together but without crowding.
Importance of Drainage in Pot Selection
Drainage is a key factor in pot choice. Look for pots with multiple drainage holes at the bottom. These holes prevent water from accumulating around the bulbs’ bases, which can cause rot or fungal issues. If your chosen pot lacks sufficient drainage, consider drilling extra holes or adding a layer of broken pottery shards or gravel at the bottom to improve water flow.
Choosing the Right Soil for Bulbs
The soil inside your container significantly influences bulb health. Use high-quality potting compost specifically designed for container gardening. This type of compost balances moisture retention with excellent drainage, ensuring that roots receive oxygen while staying hydrated.
Avoid garden soil or heavy soils that compact easily and retain too much water—these conditions stress bulbs and limit flowering potential. A good potting mix often contains ingredients like peat moss, perlite, or vermiculite to enhance aeration and nutrient availability.
Tips for Optimizing Container Soil
Some tips to optimize your container soil:
- Fill the pot with fresh potting compost rather than reusing old soil.
- Incorporate slow-release fertilizer formulated for flowering plants to provide steady nutrition.
- Ensure the compost layer is deep enough (about 10 cm or 4 inches at the base) before placing bulbs.
- Firm the compost gently around bulbs to eliminate air pockets but avoid compacting too tightly.
Proper pot selection combined with nutrient-rich, well-draining container soil creates an environment where bulbs can thrive. Healthy root development leads directly to stronger shoots and more vibrant blooms during the growing season.
Step-by-Step Guide to Planting Bulbs in Pots
Planting bulbs in pots requires careful preparation and attention to detail to ensure healthy growth and vibrant blooms. Here’s how to plant bulbs in pots effectively, focusing on planting depth, bulb orientation, and layering techniques.
1. Prepare the Pot Base
- Start by adding a base layer of about 10 cm (4 inches) of high-quality potting compost into your chosen container.
- This layer provides enough depth for root development and drainage.
- Optionally, place broken pottery shards or small stones at the bottom over drainage holes to enhance water flow and prevent soil loss.
2. Arrange Bulbs with Pointed Ends Upwards
- Position each bulb with the pointed end facing upwards; this is usually where shoots will emerge.
- If you’re unsure, check for any small root tips at the base—those go downwards.
- Proper orientation encourages strong, upright growth and successful flowering.
3. Use the Layering Technique for Succession Blooms
Layering bulbs allows you to enjoy continuous flowering as different varieties bloom at staggered times. This technique is part of a broader strategy on how to grow more flowers than you ever thought possible.
- Place larger and later-flowering bulbs (such as tulips or lilies) at the bottom of the pot, deeper into the compost.
- Add a layer of compost (about 5 cm or 2 inches) over these bulbs.
- Next, position smaller or earlier-flowering bulbs (like crocuses or snowdrops) near the top layer, closer to the surface.
- This arrangement ensures that early bloomers appear first, followed by later ones emerging from below.
4. Cover Each Layer with Compost and Firm Gently
- After placing a layer of bulbs, cover them carefully with compost.
- Press down gently but firmly to eliminate air pockets without damaging the bulbs.
- Repeat layering if using multiple bulb types until you reach about 5–10 cm (2–4 inches) below the pot rim.
5. Final Touches Before Planting Completion
- Once all layers are planted and covered, water the pot thoroughly to settle the soil around the bulbs.
- Ensure that no compost remains dry between layers because this can cause uneven moisture distribution affecting bulb development.
This methodical approach to how to plant bulbs in pots guarantees optimal planting depth and placement for maximum flowering impact. Layering bulbs not only saves space but also extends your floral display over weeks, making your potted garden vibrant and dynamic.
Positioning and Care After Planting
Proper bulb care in pots starts with selecting the right spot for your containers. Bulbs need plenty of sunlight to develop strong shoots and vibrant flowers. Aim to place your pots in locations that receive at least 6 hours of direct sunlight daily. Ideal spots include:
- South-facing patios or balconies
- Sunny window sills
- Doorsteps with good exposure
Avoid shaded areas where bulbs may struggle to grow or produce weak blooms.
Watering Immediately After Planting
Watering is crucial immediately after planting. Give your pots a thorough soak to settle the compost around the bulbs and eliminate air pockets. This initial watering jump-starts root development and supports moisture retention in the soil.
Maintaining Moisture Levels
Once shoots start to emerge in spring, maintain consistent moisture levels by watering regularly. Keep the soil evenly moist but avoid waterlogging, which can cause bulb rot. Tips for watering potted bulbs effectively include:
- Check soil moisture with your finger about 2 cm deep; water if dry.
- Water early in the day to allow foliage to dry before evening.
- Use pots with drainage holes to prevent standing water.
- Reduce watering during rainy periods or once flowering finishes.
Sunlight combined with proper watering encourages robust growth and prolific flowering. Neglecting either can lead to poor bulb performance or disease issues.
Taking care of potted bulbs through correct positioning and attentive watering sets a strong foundation for a flourishing seasonal display. These practices maximize flowering potential while ensuring healthy plants year after year.
Maximizing Flowering Display Through Arrangement Techniques
Achieving a vibrant, dense floral display in pots depends largely on smart bulb spacing in pots and strategic layering. Plant bulbs close together, about one bulb’s width apart. This tight spacing encourages a fuller, more lush appearance once flowers bloom, minimizing empty gaps and maximizing visual impact.
Layering for Extended Interest
Layering bulbs is a technique that offers extended interest by staggering bloom times. Arrange larger and later-flowering bulbs at the bottom of the pot, while placing smaller or earlier-flowering types near the top. This method creates succession blooms, so as one group fades, another begins to flower. You get continuous color and texture changes that keep your container garden lively for weeks.
Experimenting with Color Combinations
Experiment with color combinations in container gardening to enhance aesthetic appeal. Mixing complementary or contrasting colors generates striking effects. For instance:
- Pair bright yellow daffodils with deep purple crocuses for high contrast.
- Combine soft pink tulips with white hyacinths for a subtle, elegant look.
- Use multiple shades of the same color, like reds or blues, to create harmonious gradients.
Adding Dimension with Creative Layering
Creative layering can also involve mixing bulb heights and flower shapes to add dimension. Tall alliums combined with low-growing crocuses draw the eye upward while filling the base with color.
Planting bulbs densely and layering thoughtfully transforms simple pots into dynamic floral displays that evolve over time. These techniques optimize space and flowering potential, making container gardening both practical and visually rewarding.
Post-Bloom Care and Maintenance of Bulbs in Pots
Proper care after flowering is essential to ensure your bulbs remain healthy and ready to bloom again next season. Paying attention to deadheading flowers and foliage care after blooming will help your bulbs store energy efficiently.
1. Deadheading Flowers
Remove faded or spent blooms promptly. This practice prevents the plant from directing its energy into seed production, which can weaken the bulb. Instead, energy is conserved within the bulb for root development and flower formation in the following year. Use clean scissors or pinch off flower heads close to the stem without disturbing the surrounding foliage.
2. Foliage Care After Blooming
Leaves play a critical role in replenishing the bulb’s nutrient reserves through photosynthesis. Allow the foliage to die back naturally; this process can take several weeks depending on the variety and conditions. Avoid cutting or removing leaves while they are still green as this interrupts nutrient storage.
3. How to Store Energy for Next Season
During this natural decline phase, bulbs absorb sugars produced by the leaves and convert them into starches stored underground. These reserves fuel early growth when you plant bulbs again next autumn or spring. For potted bulbs, maintaining good watering practices during leaf senescence supports this vital energy transfer.
4. Additional Tips
- Resist the temptation to tidy up pots too soon after flowering ends.
- Keep pots in a sheltered spot where leaves can wither without disturbance.
- If pests or diseases affect foliage, remove affected leaves carefully to prevent spread while still allowing healthy leaves to function.
Following these post-bloom steps keeps your bulbs vigorous and increases chances of strong flowering when you repeat the cycle of How to Plant Bulbs in Pots. Consistent maintenance after blooming makes container bulb gardening a sustainable and rewarding experience year after year.
Seasonal Tips for Growing Bulbs Successfully in Pots
Caring for bulbs in pots throughout the year requires attention to seasonal changes. You need to adapt your routine to protect the bulbs and support their growth cycle effectively.
Winter Care for Potted Bulbs
Bulbs are sensitive to harsh winter conditions, especially when grown in containers. Pots can expose roots to more extreme temperature fluctuations than garden soil. Use these strategies for protecting bulbs from frost and winter damage:
- Shelter the pots: Place containers in a sheltered spot such as against a wall, under eaves, or inside a cold frame. Avoid locations where heavy rain can saturate the compost.
- Insulate pots: Wrap containers with horticultural fleece, bubble wrap, or burlap to reduce freeze-thaw cycles that can harm bulbs.
- Elevate pots: Keep pots off cold ground using pot feet or bricks. This prevents waterlogging and allows air circulation, reducing bulb rot risk.
- Avoid prolonged freezing: If temperatures are expected to stay below freezing for long periods, consider moving pots into an unheated garage or shed where frost damage is less severe but bulbs remain dormant.
Adjusting Watering Frequency by Season
Water requirements change with temperature and bulb activity. Key watering tips include:
- Reduce watering in winter: Bulbs enter dormancy and require minimal moisture. Overwatering during cold months can lead to rotting.
- Monitor moisture levels: Compost should be slightly damp but not waterlogged. Check regularly because drying out completely can stress bulbs.
- Increase watering in spring: As shoots emerge, gradually increase watering frequency to support new growth and flower development.
- Avoid soggy conditions: Ensure drainage holes remain clear throughout all seasons—excess water trapped in pots is detrimental.
Moving Pots Seasonally
Relocating your potted bulbs helps optimize their growing conditions:
- Winter positioning: Use protected areas with indirect light and shelter from wind and heavy rain.
- Spring sun exposure: Move pots into full sun once shoots appear to encourage strong flowering.
- Summer care: After flowering ends, bulbs often enter a rest period. Depending on the species, you may leave pots outdoors in partial shade or move them indoors into cooler spots until next planting season.
Adhering to these seasonal care practices ensures healthy bulb development and maximizes flowering performance year after year.
Popular Bulb Varieties Explained for Container Gardening
Selecting the right bulbs for pots means understanding their specific needs and characteristics. Some bulbs adapt better to container environments, offering reliable results and vibrant displays.
Snowdrops: Thriving in Moist Soil
- Snowdrops care in pots involves providing consistently moist soil, mimicking their natural woodland habitat.
- These bulbs prefer cool, shaded spots but can handle partial sun.
- Good drainage is essential to avoid waterlogging while maintaining soil moisture.
- Planting snowdrops closely in pots creates a charming carpet of delicate white blooms early in the season.
- They multiply steadily, making them a rewarding choice for container enthusiasts who want a naturalized look.
Daffodils: A Reliable Choice
- Known for their dependability, daffodils reliability makes them ideal for beginners and experienced gardeners alike.
- They tolerate a range of light conditions but flourish best in full sun or partial shade.
- Daffodils perform well in pots because they require minimal maintenance and resist pests such as squirrels and rodents.
- Their bright yellow or white flowers bring consistent spring cheer year after year.
- Choose varieties like ‘Tête-à-Tête’ or ‘February Gold’ for smaller pots without sacrificing floral impact.
Tulips: Variety and Vibrancy
- Tulips are prized for their incredible diversity; tulip varieties container growing provides endless options to suit any decorative scheme.
- From classic reds and pinks to bi-colored and fringed petals, tulips can brighten patios, balconies, and windowsills with bold color.
- They require well-drained soil and benefit from cooler temperatures during winter months to trigger blooming.
- Mixing early-, mid-, and late-flowering tulip types within containers extends the display period significantly.
- Layering tulips with other bulbs adds texture and contrast, enhancing visual interest.
Fragrant Hyacinths: Sensory Delight
- Hyacinths offer more than just color; their intense scent adds an aromatic dimension to container gardens.
- They grow well in pots due to their compact size and manageable growth habit.
- Provide them with bright light and moderate watering to encourage strong stem development and abundant blooms.
- Combining fragrant hyacinths with non-scented bulbs like crocuses or daffodils creates both visual appeal and fragrance variety.
Bulbs such as snowdrops, daffodils, tulips, and hyacinths each bring unique qualities that cater well to container gardening. Understanding their individual preferences helps you create stunning, thriving pot displays tailored to your space.
Conclusion
Planting bulbs in containers opens up a world of possibilities for gardeners working with limited space. The benefits of bulb planting in containers go beyond just saving room — you gain flexibility, creativity, and the joy of seasonal color right at your doorstep or balcony.
Try mixing different bulb types and colors to create eye-catching displays that bloom successively throughout spring. For example:
- Combine early crocuses with mid-season tulips and late daffodils for continuous flowering.
- Layer contrasting colors like deep purple irises with bright yellow daffodils to make your pots pop.
- Experiment with fragrant hyacinths alongside bold alliums to engage both sight and smell.
These creative gardening ideas for small spaces keep your container garden dynamic and interesting year after year. Each season offers a fresh chance to rearrange bulbs or try new varieties, turning your pots into living canvases.
Remember, learning how to plant bulbs in pots is just the beginning. Watching shoots emerge, flowers bloom, and foliage fade gracefully rewards your patience and care. With attention to proper planting techniques, positioning, watering, and maintenance, you can enjoy vibrant floral displays through multiple seasons.
Embrace the process as much as the results. Container bulb gardening is accessible, satisfying, and endlessly inspiring — a perfect way to bring nature’s beauty into your everyday life no matter how small your outdoor space may be.
FAQs (Frequently Asked Questions)
What are the best types of bulbs to plant in pots for spring and summer flowering?
For spring-flowering bulbs suitable for pots, popular choices include tulips, daffodils, crocuses, irises, and hyacinths. For summer-flowering bulbs ideal for autumn planting in containers, consider alliums, lilies, and crocosmia.
How do I choose the right container and soil for planting bulbs in pots?
Select large containers with adequate drainage holes to prevent waterlogging. Use high-quality potting compost that ensures good drainage and provides essential nutrition to support healthy bulb growth in containers.
What is the step-by-step process for planting bulbs in pots effectively?
Begin by preparing the pot with a base layer of about 10 cm (4 inches) of compost. Arrange bulbs with pointed ends facing upwards. Use layering by placing larger and later-flowering bulbs at the bottom and smaller or earlier-flowering ones near the top to achieve succession blooms. Cover each bulb layer with compost and gently firm without damaging the bulbs.
How should I position and care for potted bulbs after planting?
Place your pots outdoors in sunny spots to encourage healthy growth and vibrant flowering. Water immediately after planting and maintain regular watering once shoots emerge in spring to support development.
What techniques can maximize flowering display through bulb arrangement in pots?
Plant bulbs close together—approximately one bulb’s width apart—to maximize floral density. Employ creative layering with different types or colors of bulbs to extend the flowering season and enhance visual interest in your container garden.
How do I care for my potted bulbs after they have bloomed to ensure future growth?
Deadhead faded flowers promptly to encourage energy storage within the bulb instead of seed production. Allow leaves to die down naturally before removal so the foliage can replenish nutrients essential for next season’s growth.