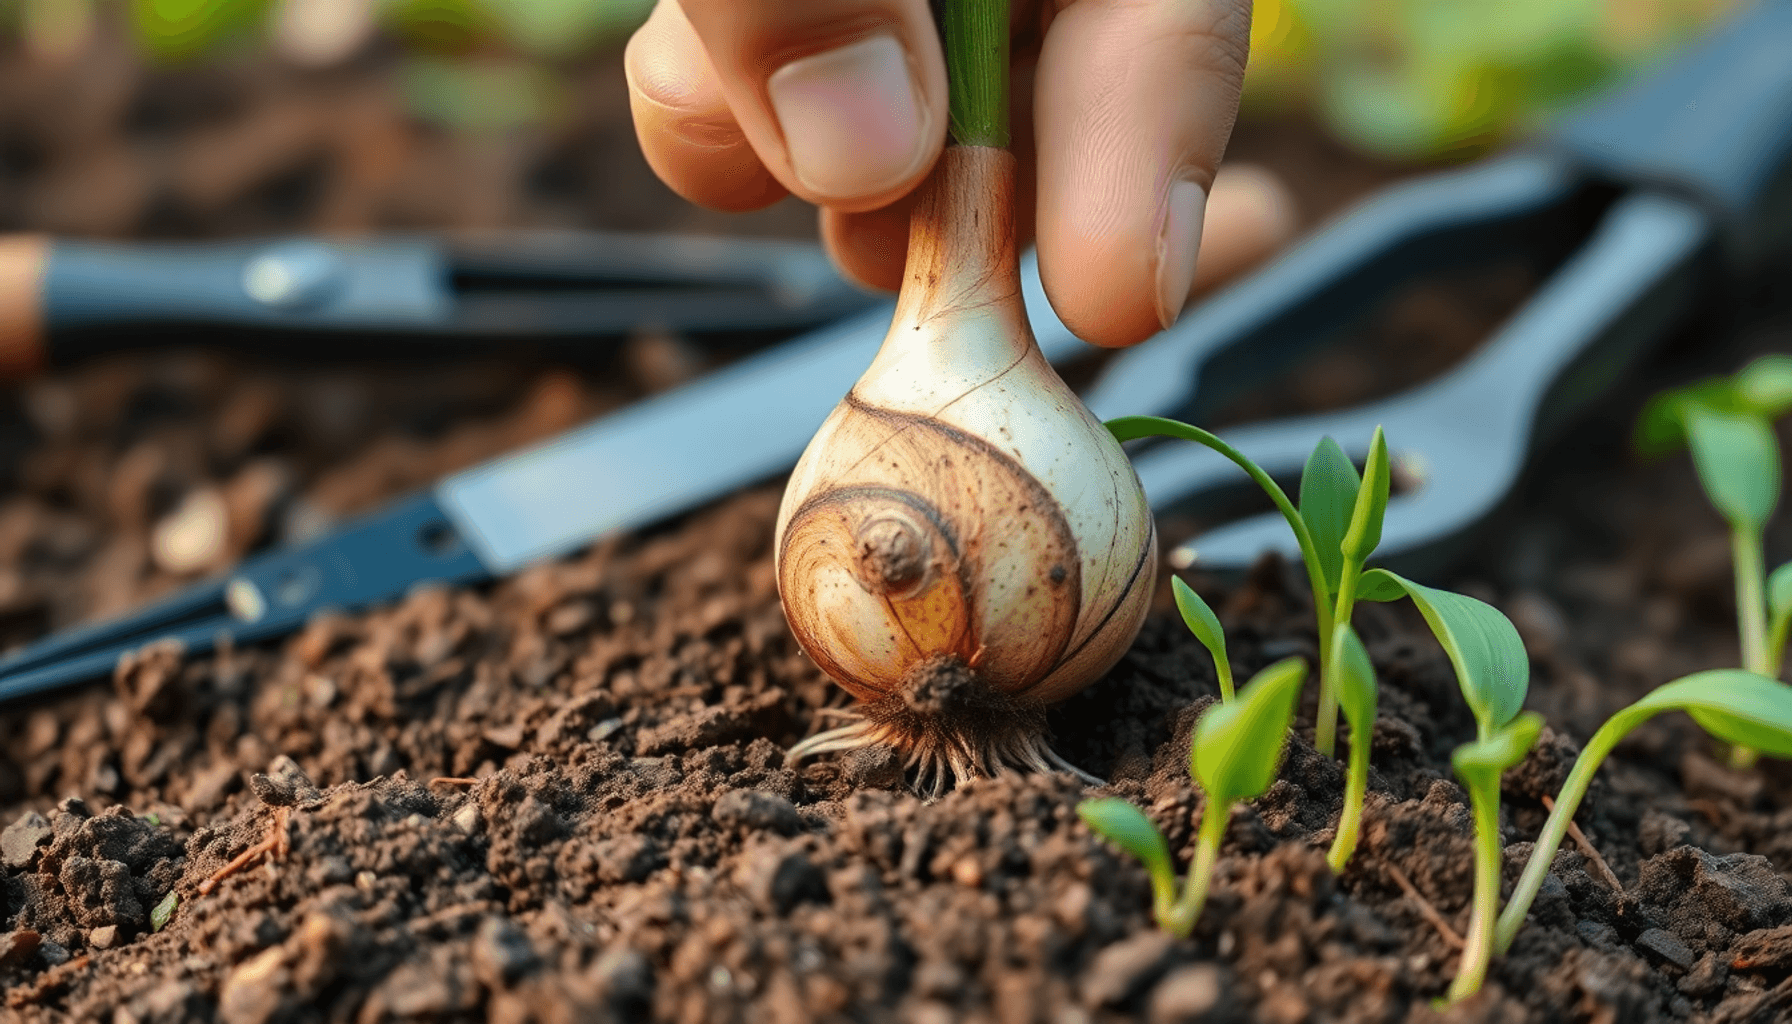

Knowing which way up to plant bulbs is essential for successful gardening. Bulbs are underground storage organs that contain all the energy a plant needs to sprout, grow, and bloom. Planting bulbs incorrectly can lead to delayed growth, weak shoots, or even failure to emerge.
This guide covers bulb planting basics and helps you identify the correct orientation for common bulb types such as:
- Tulips
- Daffodils
- Crocus
- Lilies
- Gladioli
- Nerines
Getting the direction right ensures your bulbs develop strong roots and healthy shoots, setting the stage for vibrant flowers throughout the growing season. You’ll learn how to distinguish the growing tip from the root base and understand key differences among bulbs, corms, and tubers.
Understanding Bulbs and Their Structure
Bulbs are underground storage organs that help plants survive harsh conditions like cold winters or dry seasons. They store important nutrients and energy needed for growth and flowering when the weather becomes favorable again. Knowing the different parts of a bulb is essential for planting them properly, which will lead to healthy growth and beautiful flowers.
Parts of a Bulb
A typical bulb has several distinct parts:
- Growing point (pointed tip): This is the smooth, often sharp end of the bulb where new shoots will emerge. It acts as the source of upward growth, eventually breaking through the soil surface.
- Roots (rough base): Located at the opposite end of the growing point, this rougher underside produces roots that anchor the plant and absorb water and nutrients from the soil.
- Tunic: The outermost protective layer of a bulb, often papery or leathery in texture. The tunic shields the inner scales from damage, pests, and drying out while still allowing air exchange.
The fleshy scales inside the bulb act as nutrient reservoirs that fuel initial growth before leaves can photosynthesize. These scales wrap around the growing point, protecting it while storing starches and sugars essential for early development.
How Bulb Structure Affects Planting
Knowing these parts helps you identify how to position bulbs when planting—ensuring the pointed tip faces upwards toward sunlight while roots face down into the soil for optimal nutrient uptake.
Identifying the Right End of the Bulb for Planting
Recognizing the correct orientation of a bulb is crucial to ensure healthy growth and timely emergence. The two primary ends you need to distinguish are the pointed tip (the growing point) and the root end (rough base).
Pointed Tip: The Growing Point
- Usually appears as a smooth, tapered end on the bulb.
- This tip is where new shoots or leaves will emerge once planted.
- It may resemble a small cone or nipple-like projection.
- Planting with this pointed tip facing upward directs energy toward shoot growth.
- Proper orientation allows shoots to break through the soil surface efficiently.
Root End: The Rough Base
- Characterized by a rougher texture compared to the smooth tip.
- This end is typically flatter or slightly concave.
- Roots will sprout from this side, anchoring the plant and absorbing nutrients.
- Planting with the root end facing downward encourages roots to grow into the soil naturally.
- Incorrect placement can delay root establishment and stunt early growth.
When handling bulbs, gently clean off excess soil if needed to better observe these features. Some bulbs might have less obvious tips, but careful inspection reveals subtle differences in texture and shape between ends.
Correctly identifying the pointed tip and rough base ensures you position your bulbs for optimal development right from planting. This simple step sets the foundation for vigorous shoots reaching upward and strong roots growing downward.
Dealing with Corms, Tubers, and Other Special Cases
Understanding corm planting and tuber orientation is essential when you ask yourself, Which Way Up to Plant Bulbs? While bulbs have a distinctive pointed tip and root base, corms and tubers require a different approach due to their unique structures.
Differences Between Bulbs, Corms, and Tubers
- Bulbs: Made up of layered fleshy scales surrounding a central growing point. Examples include tulips and daffodils.
- Corms: Solid, swollen stem bases covered with tunic-like layers but without the layered scales of bulbs. They store nutrients in a compact form. Crocus and gladiolus grow from corms.
- Tubers: Thickened underground stems or roots that store food. Unlike bulbs and corms, tubers lack a defined top or bottom. Dahlias and begonias are common tuberous plants.
The main challenge with tubers lies in their irregular shapes and the absence of an obvious growing tip, making their correct orientation less straightforward than with bulbs or corms.
Handling Tuber Orientation
Many gardeners struggle to identify the "right way up" for tubers because they don’t have a clear pointed end like bulbs. You might notice small buds or "eyes," but these can be scattered around the tuber rather than concentrated on one side.
Planting tubers on their side is widely accepted as best practice when unsure about orientation:
- The plant’s shoots will naturally find their way upward regardless of initial position.
- Roots will develop from the underside as the tuber adjusts in the soil.
- This adaptability reduces potential damage from incorrect placement.
Corm Planting Tips
With corms, you can usually spot a flattened basal plate (root side) opposite a rounded growing tip:
- Place the rounded tip facing upwards.
- The flat basal plate should be buried downward to allow roots to extend properly.
Incorrect positioning of corms may delay emergence but rarely prevents growth altogether.
Understanding these differences helps you handle each type confidently. Knowing how to orient bulbs is just one part of successful planting; recognizing when flexibility is needed—especially with tubers—ensures better results in your garden.
Planting Depth, Spacing, and Group Arrangements for Bulbs
Correct bulb planting depth is essential to ensure strong growth and protection from cold weather. The general guideline is to plant bulbs at a depth that is two to three times their own height. For example, if you have a bulb that is 2 inches tall, plant it 4 to 6 inches deep in the soil. This depth offers several benefits:
- Frost protection for bulbs: Planting deeper shields the bulb from sudden cold snaps or frost, which can damage the delicate growing point.
- Healthy root development: A deeper planting encourages roots to grow downward, anchoring the plant firmly and allowing it to access moisture and nutrients more effectively.
Spacing between bulbs plays a significant role in their health and appearance. Aim to space bulbs about twice their width apart from each other. If a bulb measures 1.5 inches across, leave approximately 3 inches between each bulb. Proper spacing provides:
- Better air circulation around each bulb, reducing the risk of fungal diseases.
- Adequate room for each plant’s roots to expand without competition.
- Less overcrowding above ground, which helps maintain vigorous growth and prevents weak stems.
Planting bulbs in clusters rather than singly creates a more striking display. Grouping six or more bulbs together in garden borders or beds enhances the visual impact and mimics natural growth patterns seen in wildflower meadows. Benefits of group arrangements include:
- A fuller, more natural look with abundant color.
- Easier maintenance since watering and feeding can be concentrated on specific areas.
- Improved pollinator attraction due to larger patches of flowers blooming simultaneously.
Consider mass planting popular varieties such as tulips or daffodils in groups to transform your garden borders into vibrant focal points throughout their flowering season.
What If You Accidentally Plant Bulbs Upside Down?
Planting bulbs upside down is a common concern, especially for gardeners new to bulb planting. When you plant a bulb with the pointed tip facing downward and the root end upward, it’s known as upside down bulb planting. This mistake doesn’t necessarily mean your bulbs won’t grow, but it does affect how quickly and vigorously they develop.
How bulbs respond to upside down planting:
- Bulbs have an innate ability to correct their orientation underground. The growing point or shoot inside the bulb senses gravity and light direction, prompting it to grow upward toward the soil surface. This phenomenon is similar to how seeds know which way is up, allowing them to sprout correctly even when planted incorrectly.
- Shoots may take longer to emerge because they have to change direction first. This delayed emergence can push back flowering time by several days or even weeks.
- Root growth may be less efficient initially since roots normally grow downward from the rough base. If roots struggle to establish quickly, the bulb’s overall vigor could suffer during that growing season.
- Smaller or weaker bulbs are more vulnerable to damage from upside down planting because they rely heavily on quick root development for nutrient uptake.
Impacts on growth vigor and timing:
- Some bulbs like tulips and daffodils often manage well despite being planted upside down, showing only minor delays.
- More sensitive species or those with shorter growing seasons might produce weaker shoots or reduced flower size if planted incorrectly.
- You might notice uneven growth patterns or delayed leaf development as the bulb adjusts its orientation underground.
Practical advice if you suspect upside down bulb planting:
- Don’t dig up bulbs immediately; disturbance can harm developing roots and shoots.
- Mark your planting holes next time or use visual cues such as the pointed tip shape to ensure proper orientation.
- For future plantings, focus on identifying the smooth tip versus the rough root end before placing bulbs in soil.
Upward growth is often possible even under challenging conditions, but correct planting orientation remains crucial for optimal results. Recognizing this resilience in bulbs helps reduce worry if mistakes happen while reinforcing why careful planting matters.
Step-by-Step Guide to Planting Bulbs Correctly
Knowing which way up to plant bulbs is essential for successful growth. Follow this clear, practical process on how to plant bulbs step by step.
1. Identify the Growing Tip and Root End
Examine each bulb closely. The pointed tip is smooth and slightly elongated—this is where shoots will emerge. The rougher base feels firm and may have small root remnants; this side produces roots. Always orient the bulb with the pointed tip facing upward.
2. Prepare the Planting Site
Choose a well-draining location that receives suitable light for your bulb type (e.g., full sun for tulips). Loosen soil to allow roots to penetrate easily. Remove weeds or debris that could obstruct growth.
3. Dig Holes at the Correct Depth
Use a trowel or bulb planter to dig holes 2 to 3 times the height of the bulb deep, following this good rule of thumb for depth guidance. For example, if a bulb is 2 inches tall, dig 4-6 inches deep. This depth shields bulbs from frost damage and supports stable root development.
4. Space Bulbs Appropriately
Position bulbs about twice their width apart. Adequate spacing prevents overcrowding, which can reduce airflow and encourage disease. For larger bulbs like lilies, increase spacing slightly to accommodate their size.
5. Place Bulbs in the Hole with Correct Orientation
Gently place each bulb in its hole with the pointed tip up and roots down. Avoid forcing bulbs into tight spaces; they need room to expand roots freely.
6. Cover Bulbs with Soil
Backfill carefully with loose soil, ensuring no air pockets remain. Lightly press soil down to secure bulbs without compacting too hard. Water immediately after planting to settle the soil and initiate root growth.
7. Label Your Plantings (Optional)
Use markers or tags if planting multiple varieties. Helps track bloom times and locations in your garden bed.
Following these steps ensures bulbs have the best start for healthy shoots and vibrant blooms. Mastery of which way up to plant bulbs combined with proper depth and spacing creates conditions for strong growth through spring, summer, or autumn flowering periods
Conclusion
Following the best practices for planting bulbs ensures vibrant and healthy blooms year after year. Knowing Which Way Up to Plant Bulbs? is the foundation of successful bulb gardening. When you plant bulbs like tulips, daffodils, crocus, lilies, gladioli, and nerines with the pointed tip facing upwards and roots downwards at the proper depth and spacing, you set them up for strong growth and abundant flowering.
Keep these key points in mind:
- Identify the growing tip: The smooth, pointed end must face upward.
- Plant at the right depth: Two to three times the bulb’s height protects from frost and supports root development.
- Maintain adequate spacing: About twice the bulb’s width avoids overcrowding and promotes healthy air circulation.
- Group plant bulbs: Clusters of six or more create stunning displays in garden borders.
Even if you accidentally plant a bulb upside down, many will still find their way upward, though emergence might be slower. Applying this knowledge consistently improves your garden’s performance across spring, summer, and autumn-flowering varieties.
By following these straightforward guidelines, you can unlock nature’s beauty. Your efforts will result in flourishing blooms that brighten any outdoor space season after season.
FAQs (Frequently Asked Questions)
Which way up should I plant bulbs for optimal growth?
Plant bulbs with the pointed tip or growing point facing upwards, as this is where shoots will emerge. The rougher base, where roots grow, should be planted downward to ensure healthy development.
How can I identify the top and bottom of a bulb before planting?
The top of a bulb has a smooth pointed tip known as the growing point, while the bottom is rougher and is where roots emerge. Recognizing these parts helps in orienting the bulb correctly during planting.
Are there differences in planting orientation for corms and tubers compared to bulbs?
Yes, unlike bulbs, tubers often lack an obvious growing tip. It's acceptable to plant tubers on their side since they naturally adjust their growth direction. Corms should be planted with their growing point upwards similar to bulbs.
What is the recommended depth and spacing for planting bulbs?
Plant bulbs at a depth two to three times their height to protect them from frost and support root development. Space bulbs about twice their width apart to avoid overcrowding, which improves air circulation and overall growth quality.
What happens if I accidentally plant a bulb upside down?
Many bulbs can still grow shoots upward even if planted upside down, but shoot emergence may be delayed and growth vigor could be affected. Correct orientation is ideal for timely and healthy blooming.
Can you provide a step-by-step guide to planting bulbs correctly?
Certainly! First, identify the bulb's pointed tip (growing point) and rough base (roots). Dig holes at a depth two to three times the bulb's height, spaced about twice the bulb's width apart. Place each bulb with the tip facing upwards and roots downwards, then cover with soil firmly but gently to secure them for healthy growth.